You Tunic Me On

This top is "tops" to me! Everyone will look beautiful in this You Tunic Me On free crochet top pattern. Don't let the provocative title turn you off. It is a classy and elegant top. You can make one in every color and wear one for date night. It is a perfect look for a Sunday potluck or your high school reunion. You can personalize this pattern to fit any size, because it has adjustments depending on how small or large you need this easy crochet top pattern. This would also make an excellent gift for your daughter or mother. Crochet a beautiful rainbow of this free crochet top pattern.
Estimated Cost$21-$30
Time to CompleteLonger than a weekend
Primary TechniqueCrochet

HolidaySummer
Materials:
1. Bernat Cottonish by Vickie Howeel (2/4 oz/70 g; 282 yds/258m) Jade Jersey (85700)
Sizes: XS/S: 3 balls
M: 4 balls
L: 4 balls
XL: 5 bals
2/3 XL: 5 balls
4/5 XL: 6 balls
2. Sizes U.S. E/4 (3.5 mm) and U.S. G/6 (4 mm) crochet hooks or size needed to obtain gauge.
3. Stitch marker
4. Scroll down for schematic
Sizes:
To fit bust measurement:
Extra-Small/Small 28-34" [71-86.5 cm]
Medium 36-38" [91.5-96.5 cm]
Large 40-42" [101.5-106.5 cm]
Extra-Large 44-46" [112-117 cm]
2/3 Extra-Large 48-54" [122-137 cm]
4/5 Extra-Large 56-62" [142-157.5 cm]
Finished bust:
Extra-Small/Small 36" [91.5 cm]
Medium 42" [106.5 cm]
Large 45" [114.5 cm]
Extra-Large 48" [122 cm]
2/3 Extra-Large 57" [144.5 cm]
4/5 Extra-Large 66" [167.5 cm]
Gauge:
16 sc and 18 rows = 4" [10 cm] with larger hook.
Abbreviations: www.yarnspirations.com/abbreviations
Approx = Approximate(ly)
Beg = Begin(ning)
Ch = Chain(s)
Cont = Continue(ity)
Dc = Double crochet
Pat = Pattern
Rem = Remain(ing)
Rep = Repeat
Rnd(s) = Round(s)
RS = Ride side
Sc = Single crochet
Sl st = Slip stitch
Sp(s) = Space(s)
St(s) = Stitch(es)
Tog = Together
WS = Wrong side
Instructions:
Notes:
· When working ribbing, sl st loosely and do not ch at beg of rows.
· The lower part of Body (before armhole divide) is worked in rnds, but work is turned at end of each rnd to alternate RS and WS to match upper part of Body which is worked in rows.
· Ch 3 at beg of rnd or row counts as dc.
BODY
**Ribbing: With smaller hook, ch 21 (21-21-25-25-25).
1st row: Working in back loops only, 1 sl st in 2nd ch from hook. 1 sl st in each ch to end of chain. Turn. 20 (20-20-24-24-24) sts.
2nd row: Working in back loops only, 1 sl st in each of next 20 (20-20-24-24-24) sl st. Turn.
Rep 2nd row until work from beg measures 32 (36-40-44-52-60)" [81.5 (91.5-101.5-112-132-152.5) cm].
Fasten off.
Sew first row and last row tog to form bottom ribbing.
With WS facing, change to larger hook and working along side edge of ribbing, join yarn with sl st at seam.
Body: 1st rnd: (WS). Ch 1. Work 144 (168-180-192-228-264) sc evenly around. Join with sl st to first sc. Place marker on last st. Turn.
2nd rnd: (RS). Ch 1. 1 sc in first sc. Ch 3. Miss next 5 sc. [(1 dc. Ch 1) 4 times. 1 dc] all in next sc – shell made. Ch 3. Miss next 5 sc. *1 sc in next sc. Ch 3. Miss next 5 sc. Shell in next sc. Ch 3. Miss next 5 sc. Rep from * 10 (12-13-14-17-20) times more. Join with sl st to first sc. Turn.
3rd rnd: (WS). Ch 3. (1 dc. Ch 1. 2 dc) in same sp as last sl st. Ch 1. (1 sc in next ch-1 sp. Ch 3) 3 times. 1 sc in next ch-1 sp. Ch 1. *(2 dc. Ch 1. 2 dc) in next sc. Ch 1. (1 sc in next ch-1 sp. Ch 3) 3 times. 1 sc in next ch-1 sp. Ch 1. Rep from * 10 (12-13-14-17-20) times more. Join with sl st to top of ch 3. Sl st to first dc and ch-1 sp. Turn.
4th rnd: (RS). Ch 3. (1 dc. Ch 1. 2 dc) in same sp as last sl st. Ch 2. (1 sc in next ch-3 sp. Ch 3) twice. 1 sc in next ch-3 sp. Ch 2. Miss next 2 dc. *(2 dc. Ch 1. 2 dc) in next ch-1 sp. Ch 2. (1 sc in next ch-3 sp. Ch 3) twice. 1 sc in next ch-3 sp. Ch 2. Miss next 2 dc. Rep from * 10 (12-13-14-17-20) times more. Join with sl st to top of ch 3. Sl st to first dc and ch-1 sp. Turn.
5th rnd: (WS). Ch 3. (1 dc. Ch 1. 2 dc) in same sp as last sl st. (Ch 3. 1 sc in next ch-3 sp) twice. Ch 3. *(2 dc. Ch 1. 2 dc) in next ch-1 sp. (Ch 3. 1 sc in next ch-3 sp) twice. Ch 3. Rep from * 10 (12-13-14-17-20) times more. Join with sl st to top of ch 3. Sl st to first dc and ch-1 sp. Turn.
6th rnd: (RS). Ch 1. 1 sc in same sp as last sl st. Ch 3. Miss next ch-3 sp. Shell in next ch-3 sp. Ch 3. *1 sc in next ch-1 sp. Ch 3. Miss next ch-3 sp.
Shell in next ch-3 sp. Ch 3. Rep from * 10 (12-13-14-17-20) times more. Join with sl st to first sc. Turn.
7th rnd: (WS). Ch 3. (1 dc. Ch 1. 2 dc) in same sp as last sl st. Ch 1. (1 sc in next ch-1 sp. Ch 3) 3 times. 1 sc in next ch-1 sp. Ch 1. *(2 dc. Ch 1. 2 dc) in next sc. Ch 1. (1 sc in next ch-1 sp. Ch 3) 3 times. 1 sc in next ch-1 sp. Ch 1. Rep from * 10 (12- 13-14-17-20) times more. Join with sl st to top of ch 3. Sl st to first dc and ch-1 sp. Turn.
Rep 4th to 7th rnds for pat until work from marker measures approx 11 (12-12-12-13-13)" [28 (30.5-30.5-30.5-33-33) cm], ending on a 5th rnd.
Divide for Back: 1st row: (RS). Ch 1. 1 sc in same sp as last sl st. Ch 3. Miss next ch-3 sp. Shell in next ch-3 sp. Ch 3. *1 sc in next ch-1 sp. Ch 3. Miss next ch-3 sp. Shell in next ch-3 sp. Ch 3. Rep from * 4 (5-6-6-8-9) times more. 1 sc in next ch-1 sp. Turn. Leave rem sts unworked.
Cont in pat (working in rows) until work from marker measures approx 20 (21-21-23-24-24)" [51 (53.5-53.5-58.5-61-61) cm], ending on a 5th row. Fasten off.
Front: With RS facing, rejoin yarn with sl st to last worked ch-1 sp.
1st row: Ch 1. 1 sc in same sp as last sl st. Ch 3. Miss next ch-3 sp. Shell in next ch-3 sp. Ch 3. *1 sc in next ch-1 sp. Ch 3. Miss next ch-3 sp. Shell in next ch-3 sp. Ch 3. Rep from * 4 (5-5-6-7-9) times more. 1 sc in next ch-1 sp (this is a previously worked sp). Turn.
Cont in pat (working in rows) until work from marker measures approx 20 (21-21-23-24-24)" [51 (53.5-53.5-58.5-61-61) cm], ending on a 5th row. Fasten off.
FINISHING
Mark neck opening as shown on schematic and sew shoulder seams.

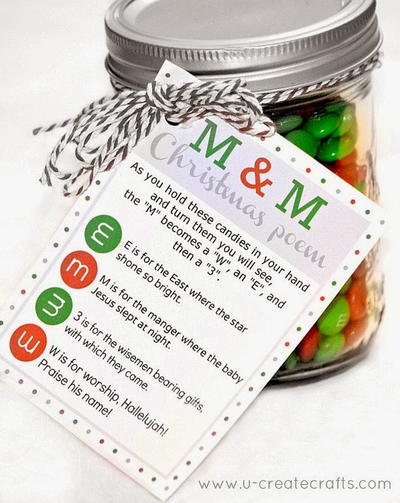
Read NextSweet Printable M&M Christmas Poem