Bountiful Garden Clay Plant Markers

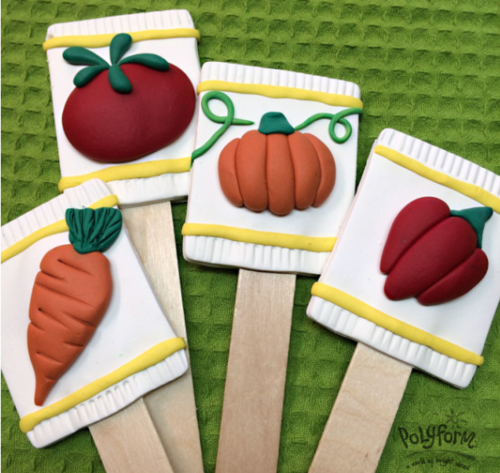
Make these Bountiful Garden Clay Plant Markers to add some charming decorations to your backyard, while also keeping track of your harvest. These DIY garden signs are quick and easy to make and you'll have a great time making these precious garden signs with pumpkins, tomatoes, carrots, and peppers. You won't find cute outdoor garden accents like these at your local hardware store so you can show off your new adorable plant stakes to all those gardening novices. These garden crafts will keep you organized and make your garden the best on the block!
Estimated Cost$21-$30
Time to CompleteIn an evening
MaterialsClay
Primary TechniqueGeneral Crafts

SeasonSpring
Materials List
- Sculpey Soufflé
- Sculpey Clay Conditioning Machine
- Sculpey Super Slicer Set, w/comfort handles
- Sculpey Clay Tool Starter Set, set of 3
- Sculpey Technique Design Blocks
- Craft sticks (1 for each plant stake)
Instructions
-
Getting Started: Polymer clay may stain. CLAY MAY DAMAGE UNPROTECTED FURNITURE OR FINISHED SURFACES. DO NOT USE polymer clay on unprotected surfaces. We recommend working on the Sculpey® Work ‘n Bake Clay Mat, wax paper, metal baking sheet, or disposable foil. Start with clean hands and work surface area. Knead clay until soft and smooth. For best results, clean your hands in between colors. Shape clay, pressing pieces together firmly. Bake on oven-proof glass or metal surface at 275°F (130 °C) for 30 minutes per ¼" (6 mm) thickness. For best baking results, use an oven thermometer. DO NOT USE MICROWAVE OVEN. DO NOT EXCEED THE ABOVE TEMPERATURE OR RECOMMENDED BAKING TIME. Wash hands after use. Baking should be completed by an adult. Begin by preheating oven to 275 °F (130 °C). Test temperature with oven thermometer for perfectly cured clay. For best results, condition all clay by running it through the Clay Conditioning Machine for several passes on the widest setting. Fold the clay in half after each pass and insert the fold side into the rollers first.
-
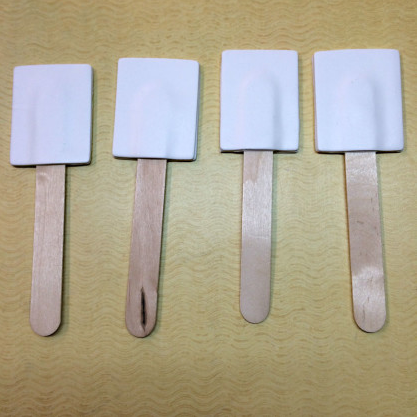
Sheet Igloo white through the clay conditioning machine on the thickest setting until smooth. Then sheet through the second thickest setting. If you do not have a clay conditioning machine, roll Igloo flat into a sheet less than 1/8” thick. Cut out eights rectangles approximately 2.25” X 2.5”. Lay the top 1” of a craft stick on each of four of the rectangles as shown.
-
Sandwich the craft sticks between the rectangles.
-
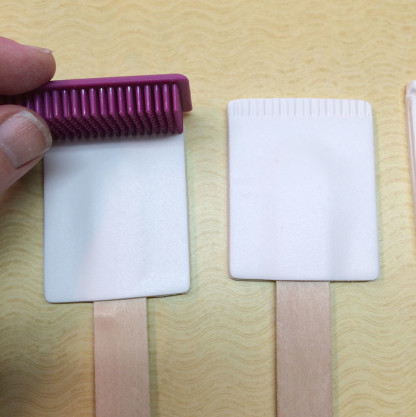
Use the side of the Dots Design Block to impress a series of little lines across the top and the bottom of the seed packets
-
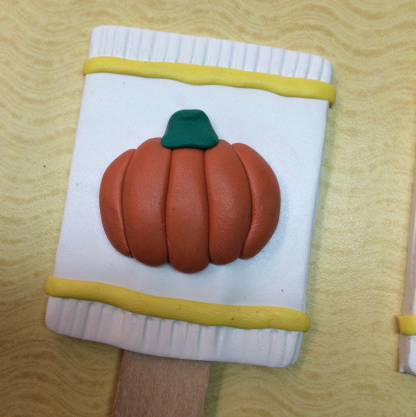
Roll a thin rope of Canary yellow about 1/16” thick. Lay the rope across the top of the rectangle just below the scored lines. Press the rope flat and trim. Repeat across the bottom of the packet just above the scored lines.
-
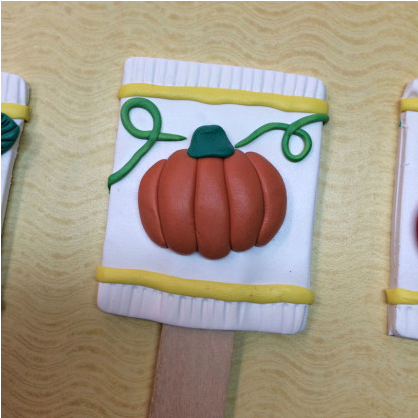
For the pumpkin, make three oval shapes and two smaller oval shapes in Pumpkin orange. Place them on the middle of the seed packet.
-
Flatten the shapes slightly. Add a Jade green pumpkin stem
-
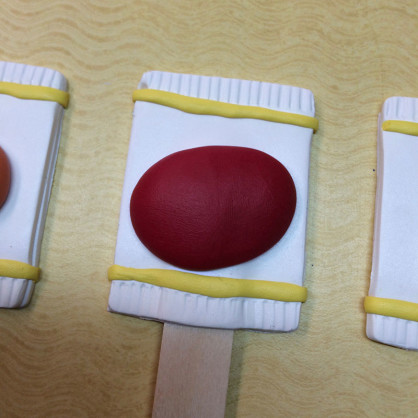
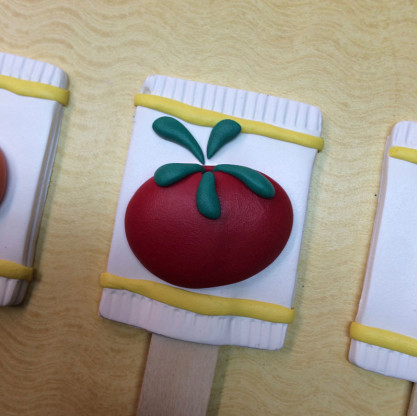
For the tomato, press an oval of Cherry Pie red to the center of the packet.
-
Add little Jade green teardrop shapes to the top of the tomato.
-
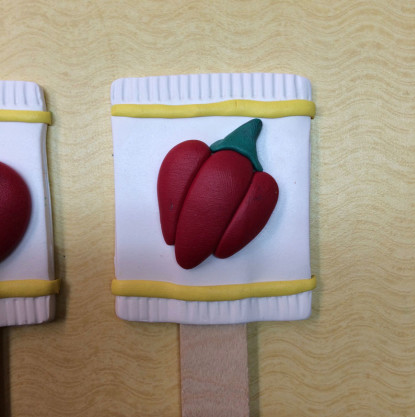
For the red pepper, make a larger oval for the center and two smaller ovals for the sides.
-
Flatten them into place slightly. Add a Jade green stem.
-
For the pumpkin, mix a little Canary and Jade together to make a yellow green. Add curlicues around the pumpkin.
-
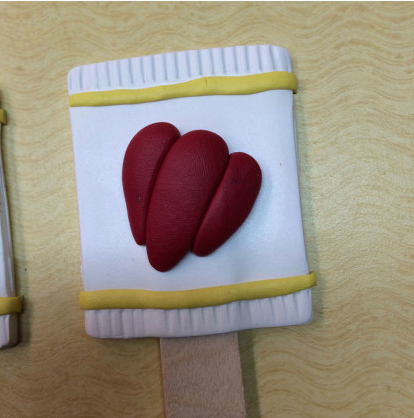
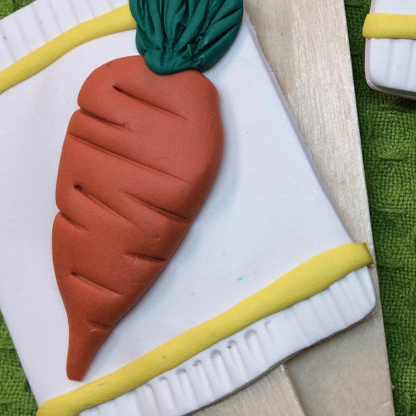
For the carrot, make a large long triangle for the carrot. Add a tuft of Jade to the top of the carrot. Score lines in the carrot and in the greens at the top.
-
Bake according to the above directions on the craft sticks. When completely cool, use them to mark your garden rows or containers and enjoy!


Your Recently Viewed Projects

Thanks for your comment. Don't forget to share!
KathrynAllison
Sep 29, 2017
These plant markers are so cute! I love that they're made with clay, because it gives them a very natural feel. Perfect for the garden!
Report Inappropriate Comment
Are you sure you would like to report this comment? It will be flagged for our moderators to take action.
Thank you for taking the time to improve the content on our site.