The Cutest Santa You Will Make this Christmas
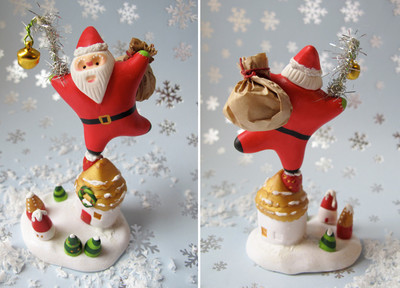
You have officially found the Cutest Santa You Will Make this Christmas for your mantelpiece or counter top display. This will be the most impressive project out of all your DIY Christmas decorations. You will mold the little village and Santa Claus going down the chimney using clay. Then you will paint Santa and add details to the village. This multimedia project will look like those professional clay Christmas projects you love when you've finished. This Santa can make a great little gift for your neighbors or friends, too!

Materials:
- Premo! Accents®, 2 oz , Frost White Glitter - 1 block clay
- Premo! Accents®, 2 oz , Bright Green Pearl - 1 block clay
- Premo! Sculpey®, 2 oz , Pomegranate - 1 block clay
- Premo! Accents®, 2 oz , 18K Gold - 1 block clay
- Sculpey® III, 2 oz , Leaf Green - 1 block clay
- Premo! Sculpey®, 2 oz , White - 1 block clay
- Sculpey® UltraLight®, 2 oz , White - 1 block clay
- Sculpey® Clay Conditioning Machine
- Sculpey Clay Tool Starter Set
- Sculpey Style and Detail Tools, Set of 3
- Sculpey Super Slicer
- Ceramic tile
- Jewelry pliers
- Scissors
- Toothpicks
- Craft paints - green, red, fleshtone, gold, and black
- Decorative scalloped scissors
- Dimensional white paint
- Glue - strong and white
Instructions:
Note: Good work surfaces include wax paper, a metal baking sheet, or disposable foil. Knead the clay until soft and smooth. Bake on oven-proof glass or metal surface at 275°F (130°C) for 30 minutes per ¼" (6 mm) thickness. For best baking results, use an oven thermometer. Begin by preheating your oven to 275°F (130 °C). For best results, condition all clay by running it through the Clay Conditioning Machine several passes on the widest setting. Fold the clay in half after each pass and insert the fold side into the rollers first.
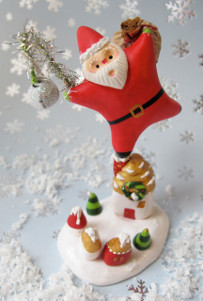
- Knead a piece of the Frost White Glitter clay so that it becomes pliable. Make a 2 ¼ x 1 ½ oval shape for the base.
- Use your stylus tools to make holes and indents for trees and houses on the base.
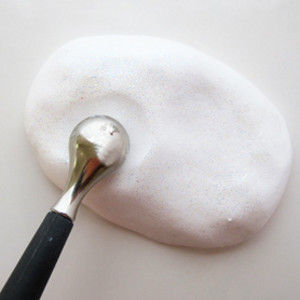
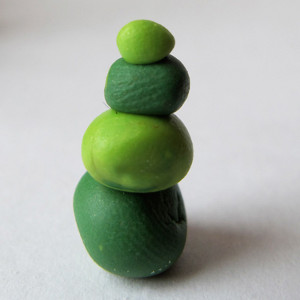
- Mix together pieces of Wasabi and Bright Green Pearl clay. Use your hands to roll out two small balls. Then, create two small balls with the Leaf Green clay. You should have four clay balls total ranging from tiny to small.
- Stack the balls, squeeze the sides together with your pointer finger and thumb, roll out, and squeeze again creating a cone-shaped tree. Make as many trees as you want on your base.
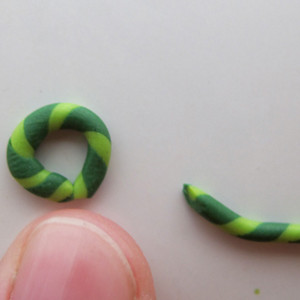
- Use a piece of your Wasabi and Bright Green clay mix and a piece of your Leaf Green clay to make two snakes. Twist both snakes together, making a striped rope. Create a circle wreath for the large house.
- Roll ¼” thick and ¼” height snakes of White Premo! for your houses. Make a few different houses using White or Pomegranate clay for the base of the house. Create Pomegranate and 18 k Gold triangle roofs for your houses. Attach the roofs to the bases using bake and bond. Create windows and doors using clay tools.
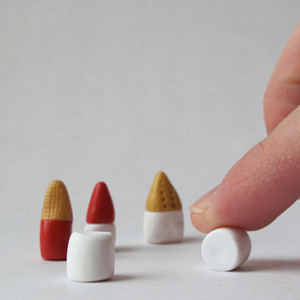
- Use your Frost White Glitter clay and make a house big enough to hold the Santa figure (about ½” x 1 ¼”).
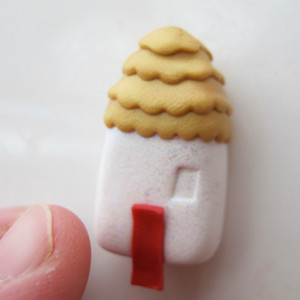
- Next you will create your own clay stamps to make details easier. Use your super slicer to cut out shapes for your windows and door, and bake the pieces.
- Roll out a piece of 18k Gold clay into the #5 setting of the conditioning machine and cut strips of clay out with your scalloped scissors.
- Wrap and layer them to create your roof.
- Run a small piece of Pomegranate clay into the #5 setting of the conditioning machine. Cut out a door for your house from this piece.
- Attach a chimney and wreath.
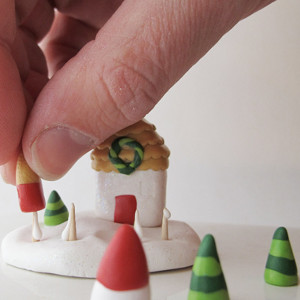
- Figure out the placement of your houses and trees on your base. Cut small pieces of toothpick with the jewelry pliers and stick them into your white base. Add bake and bond to the tips and build your town.
- Create a hole with your needle end pointer in the chimney of your large house big enough for a toothpick.
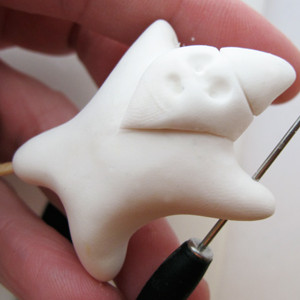
- Take a small ball of Sculpey Ultra Soft clay in your hand and form a star shape figure.
- Using your knife tool sculpt Santa’s beard and rim of his hat. Take your stylus tool to make eyes and mouth. Attach a toothpick to his leg.
- Then, using your needle end pointer, make a hole through his bag-holding hand – all the way through.
- In his bell hand, only make a hole part of the way through.
- Bake in your oven according to the directions listed in Step 1, but be sure you bake your base (with the houses and trees) separate from your Santa figure.
- Use a piece of clay and stick your Santa into it so your Santa doesn’t rest on your cooking tile. Make sure you remove your Santa from the block of clay right after baking so it doesn’t harden together.
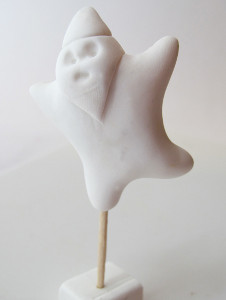
- Once cooled, lightly sand your Santa piece before painting.
- Paint the whole body red, leaving only the beard, face, and the rim of the hat white.
- Once dried paint a Black thin line around Santa’s waist for the belt. Also paint the tips of the legs black to look like boots.
- Add green to the tips of the hands for the mittens and a gold square for the belt buckle.
- Add flesh paint to the face. Then use a toothpick to add the eyes, nose, and eyebrows to the face.
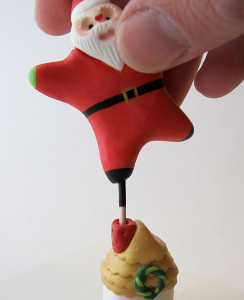
- Once dried, add white glue to the toothpick that is in the Santa and in the chimney hole on the base, and then insert into the chimney hole.
- Add 3D dimensional paint for snow effects on your town and around the brim of Santa’s hat.
- Paint a coat of matte varnish over your whole piece.

- To make Santa's bag, take a kraft color mini cupcake wrapper and fill it with something small. Then, wrap it up and tie it up with wax twine. Thread a piece of twine through the hole you left in Santa's hand.
- To make Santa's bell, take a piece a green 20 gauge wire and attach a bell. Fold the wires together and twist. As you're twisting your wire, attach a piece of tinsel. Add glue to the end and insert it into the arm.
