Darling Mice Garden Accents

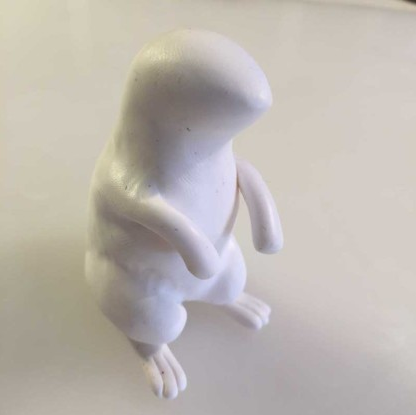
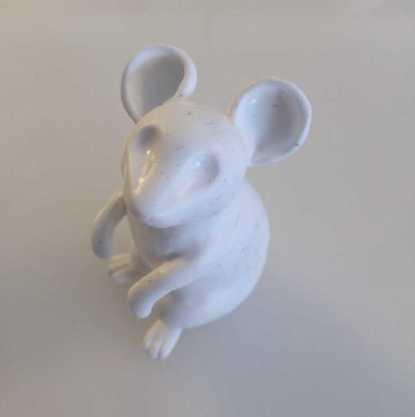
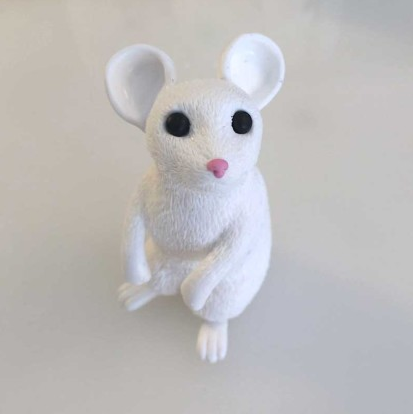
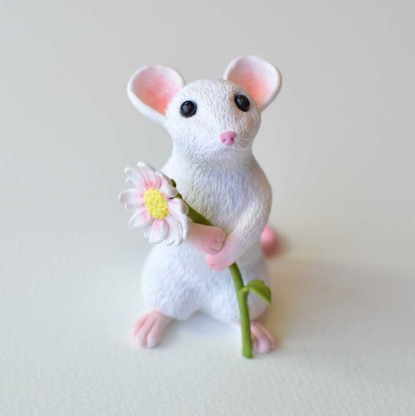
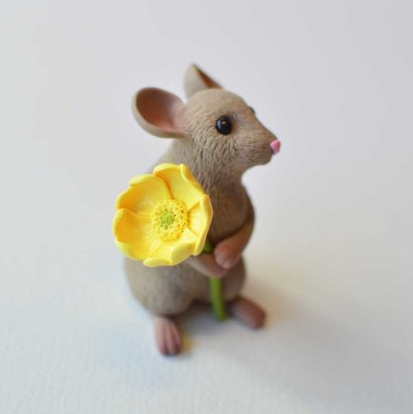
You may not want real mice in your garden, but you might want these Darling Mice Garden Accents. These adorable little guys will bring a sweet touch to your backyard garden all through the spring and summer. This cute garden DIY project will take some time, but it will be lots of fun piecing together your own precious garden figures. You will also learn how to put together a clay flower for your mice accents to hold as an added pop of color and sweetness. How could you resist making these fun mice who love to garden just as much as you do!
Estimated Cost$21-$30
Time to CompleteIn an evening
MaterialsClay
Primary TechniqueGeneral Crafts

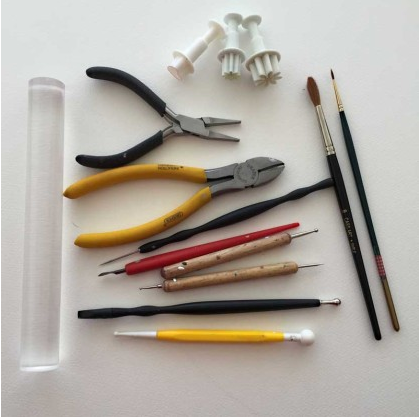
Materials List
- Premo! Sculpey®
- Wire
- Chalk pastels
- Soft Brush
- Larger soft brush
- Small heart cutter
- Small daisy shape cutter
- Wire cutters
- Assortment of ball stylus tools
Mouse Figure Instructions
-
Getting Started Polymer clay may stain. CLAY MAY DAMAGE UNPROTECTED FURNITURE OR FINISHED SURFACES. DO NOT USE polymer clay on unprotected surfaces. We recommend working on the Sculpey clay mat, wax paper, metal baking sheet, or disposable foil. Start with clean hands and work surface area. Knead clay until soft and smooth. For best results, clean your hands in between colors. Shape clay, pressing pieces together firmly. Bake on oven-proof glass or metal surface at 275°F (130 °C) for 30 minutes per ¼" (6 mm) thickness. For best baking results, use an oven thermometer. DO NOT USE MICROWAVE OVEN. DO NOT EXCEED THE ABOVE TEMPERATURE OR RECOMMENDED BAKING TIME. Wash hands after use. Baking should be completed by an adult. Begin by preheating oven to 275 °F (130 °C). Test temperature with oven thermometer for perfectly cured clay. For best results, condition all clay by running it through the Clay Conditioning Machine for several passes on the widest setting. Fold the clay in half after each pass and insert the fold side into the rollers first.
-
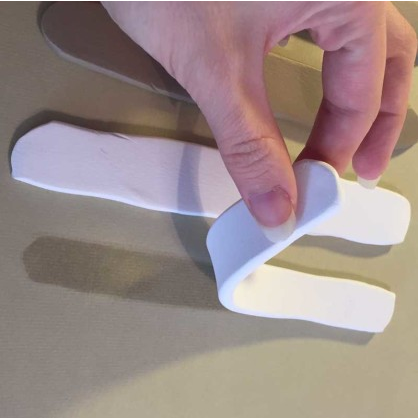
So the first thing to do is to make sure your body clay (the colour you’re using for the mouse’s body) is firm enough to work with. Too-soft clay will keep on squishing out of shape, which can be very frustrating. If you feel happy with the firmness of your body clay then you can skip this step. My clay was freshly opened so leeching it was necessary to get it into a workable state. To make clay firmer you can leech out some of its oils by rolling it out and placing it between two sheets of paper. You can then either press it with a rolling pin, or you can leave it for a while (maybe 1-2 hours) weighed down by something flat and heavy. My clay was very soft, so I did both!
-
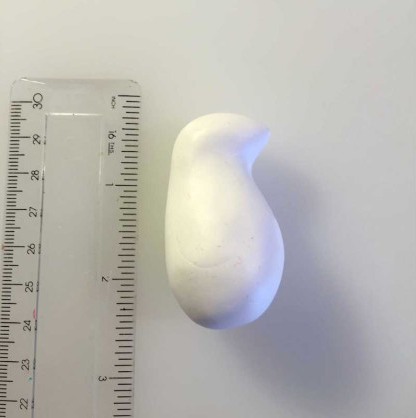
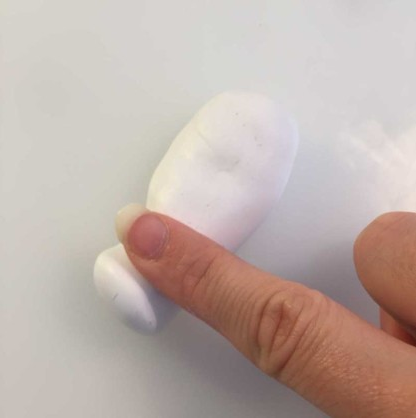
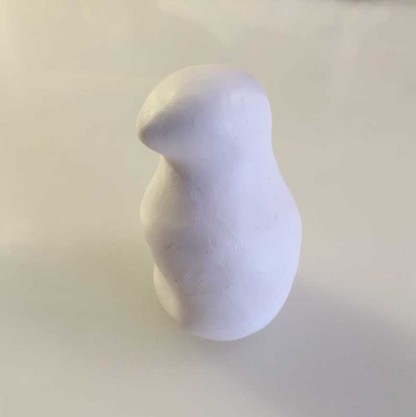
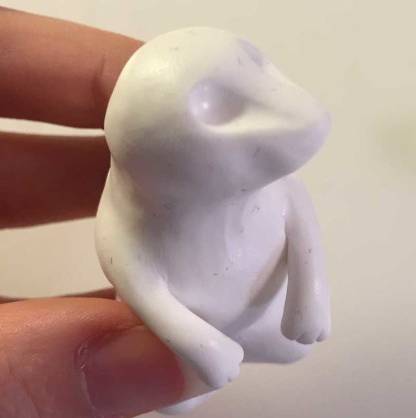
The next thing is to make your basic mouse shape. How much clay you use will depend on what size you want your mouse to be, but I used about half a 57g (2oz) pack of White Premo to create my basic mouse shape. Condition your clay before starting, and then roll it into a short sausage shape. Use a finger to roll over the place where his neck should be to create his head. Keep shaping till it looks something like this.
-
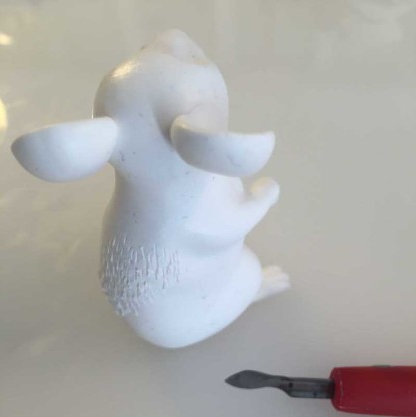
Position the clay upright on your work tile, and press in the stomach slightly around the base. The idea is to create the shape of a mouse sitting back on its haunches, so the chest should puff out a little more than the stomach.
-
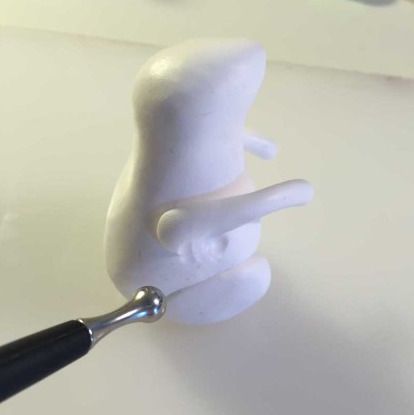
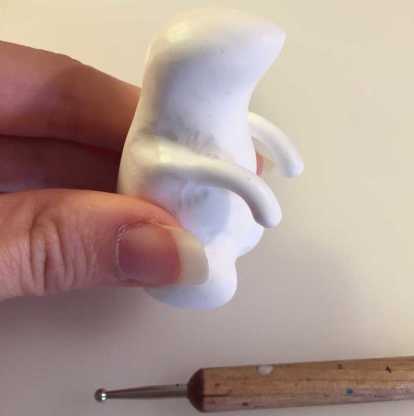
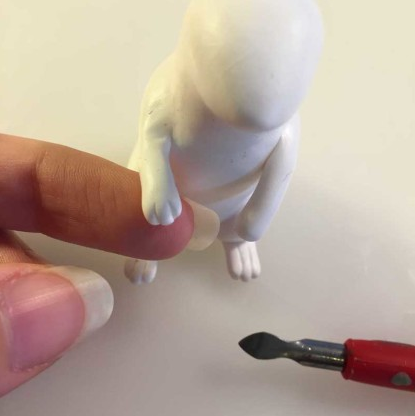
Next you need to add the haunches. Roll out two small balls of clay, a bit bigger than pea sized, and then flatten them over the mouse’s hips. To create the arms, roll out two small sausages about an inch long. Round off the hand end, flatten the shoulder end, and then press them into the mouse’s body where the shoulders would be. Keep about 1 cm of arm sticking out in front.
-
You then need to smooth over your joins. A ball ended tool works well to do this. The aim is to erase all the join lines, but still retain the shape of slightly protruding haunches and shoulders.
-
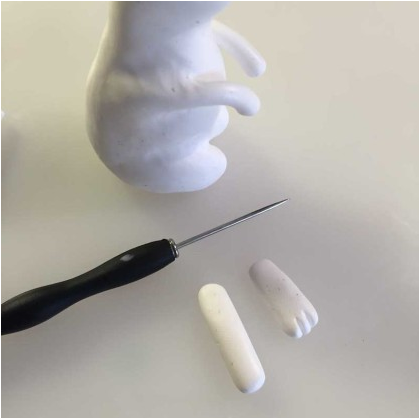
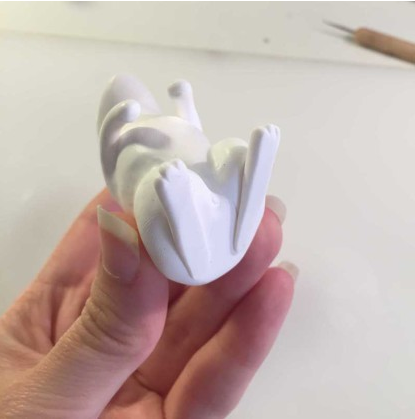
Next step is to make the feet. As with the arms, you will need to create two small sausages, about an inch long. Round off the toe end, and flatten the heel end. To create the toes you can use a needle tool to press into the toe gaps. This will shorten the feet, so pull them out a little to make sure they are long and thin. Then attach the feet to the underside of mouse’s body, angled slightly away from each other.
-
Next do the same with the paws, but making the finger gaps shorter, so the paws are smaller than the feet.
-
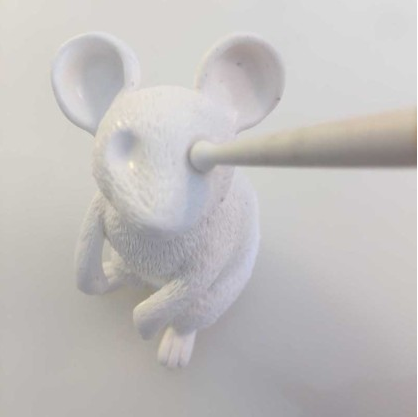
To structure the mouse’s face, you can use your ball tool (mine is about 5mm wide) to press into the place where its eye sockets should be. Don’t place these too far back in the head; you don’t want to run out of forehead! Using the ball tool create indentations on either side of the bridge of the snout, by dragging the tool from the eye sockets to the tip of the nose, lessening the pressure towards the tip. Then using the side of a finger, gently press two indentations into the side of the snout. Just keep reshaping till you’re happy with it; it can help to look at a picture of a mouse for reference!
-
For the ears, take two pea sized balls of clay, and press them over a large ball tool. Then cut out a small triangular notch and press the cut edges back together, pinching it to make a slight teardrop shape.
-
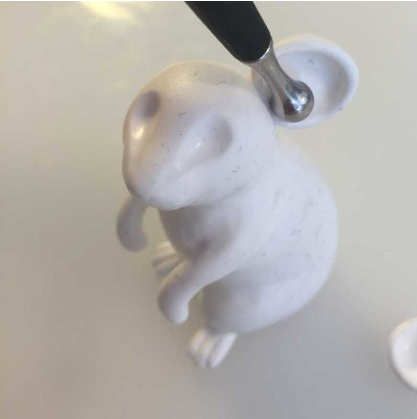
Press the ears onto the head, just a little further back then the head’s peak; You’ll want about 1 cm of forehead between the eyes and ears. Line up the point of the teardrop with the bottom of each eye to get the right positioning. Smooth out the place where they join onto the head with a ball tool.
-
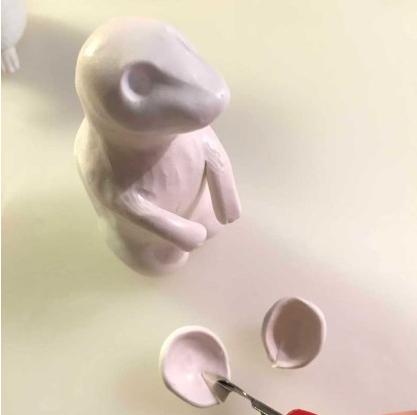
Before taking the next step it may be necessary to clean your mouse. White clay in particular will show up all the dirt and dust that clings to it. A great way to clean clay is to wipe it down with a make-up remover wipe; specifically you want wipes that have some alcohol content. Rubbing alcohol is also good if you have it. So the next step is to texture the fur. This will take a while! It’s very simple; just use a small blade tool to scratch little dashes into the clay. Cover the whole mouse, leaving just the feet, hands, and ears smooth. Pay attention to the direction your lines go in, so the fur appears to be going in the right direction. After you have completed this step, try to avoid handling you mouse too much.
-
To make the eyes, you will need to use another ball tool, smaller then the one you used for the eye sockets, to press a hole for the eye to sit in. for the eye itself, simply roll out a little ball of black – make sure to keep both eyes the same size – and then gently press the eyeball into the eye hole.
-
For the nose, take a tiny piece of pink - I made my pink by mixing the White and the Blush clays together, with about 2 parts White, to one part Blush (make enough for the tail too!) – and shape it into a tiny triangle. Place this on the tip of the snout, press it down, and then using a needle tool create two little nostrils right on the edges.
-
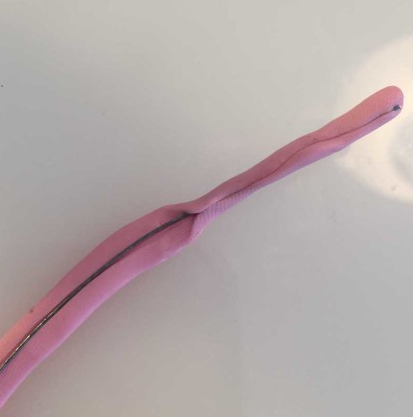
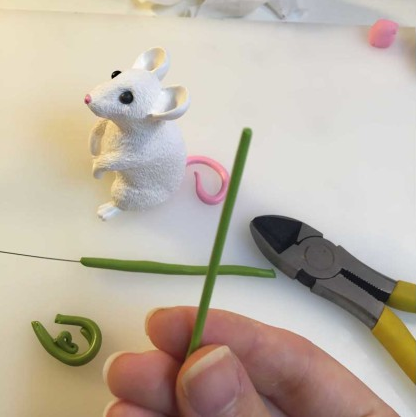
To make the tail, roll out a long worm of pink, press it down onto your tile, and then press a length of wire down the centre. Then pinch up the edges of the clay to fold over the wire. Once the wire is entirely encased in clay, roll it out on your tile till it is smooth and thin. Using wire cutters cut a length of about 2 inches, and taper one end into a point.
-
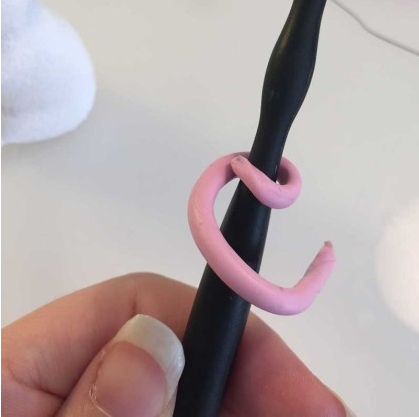
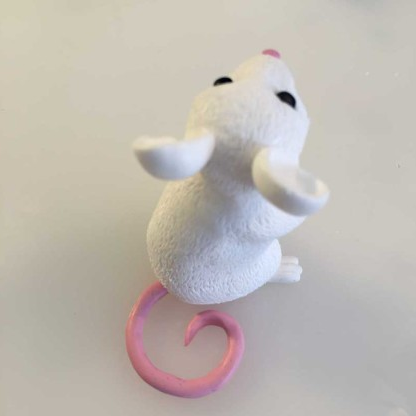
Then twist the tail into the desired shape. I curled mine around a tool; curling it around a rolling pin is also good way of keeping the curve smooth. Press the blunt end of the tail into the underside of the mouse.
Flower Instructions
-
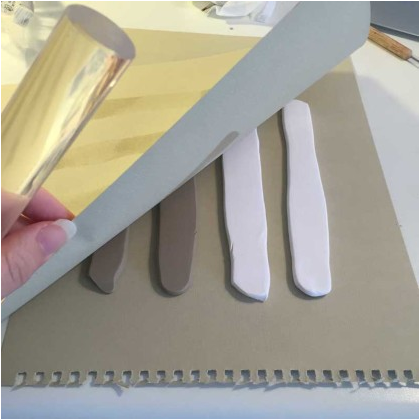
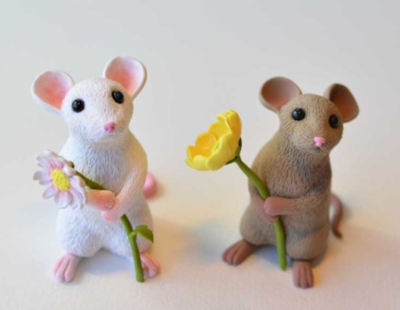
Your mouse is nearly done, now to make the flower! To make a daisy, first off you need to make the stem. I mixed my own green for this, using about 2 parts Wasabi, to one part Spanish Olive. Follow the same process as for the mouse’s tail; without the wire at it’s core the stem will not be strong enough to support the flower head. Roll the stem out thinner than the tail, and bend it only slightly.
-
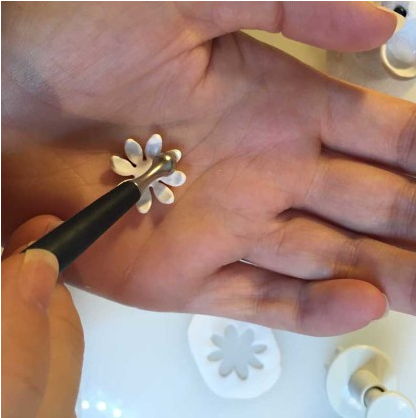
To make the daisy head you will need a small daisy shaped cutter. Cut out two thin daisy shapes in the White clay. Place the first daisy on the palm of your hand and using the ball tool press the petals, to gently curl them, and erase the bluntness of their edges. Repeat with the second daisy shape.
-
Next I used chalk pastels to give the inside of my daisy a pink blush. Scrape off a small amount of pink pastel onto a palette (you can mix pastels to create the right shade) and using a small brush dab the inside of the petals with the pink powder. Try and get it to fade outwards. Repeat with the second daisy shape.
-
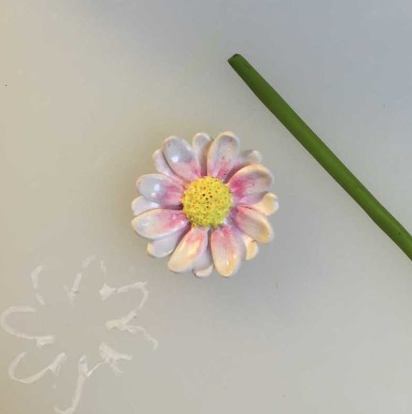
Next join the two daisies together. Try and place them so that the petals alternate. To make the centre, take a small ball of yellow and press it into the middle. Then use a very small ball tool and a needle tool to texture it.
-
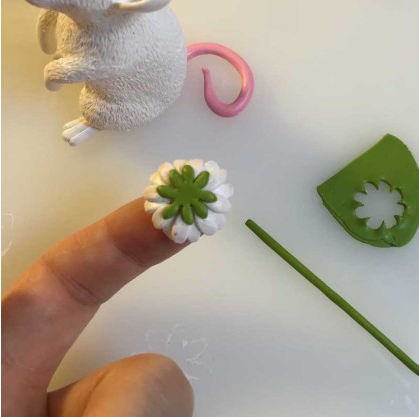
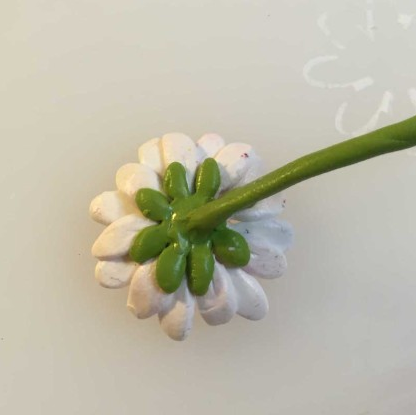
Using a smaller daisy cutter cut a thin green daisy shape to place on the back.
-
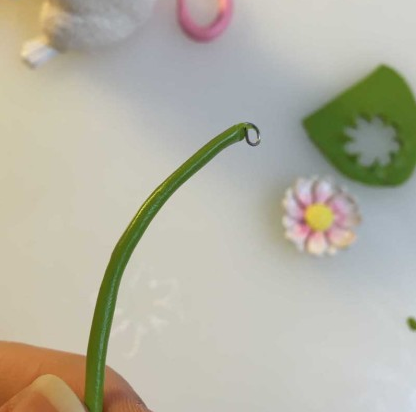
To join the stem to the flower, first you need to pinch off a bit of clay from one end of the stem to reveal the wire. Then, preferably using some small pliers, create a very small loop. This will help anchor the wire into the flower head.
-
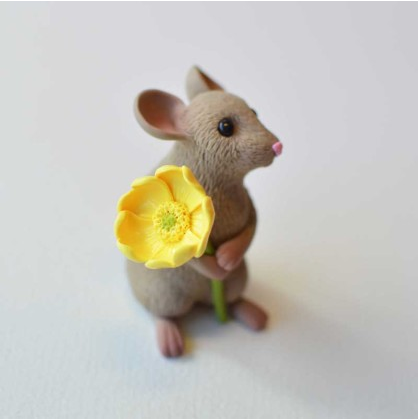
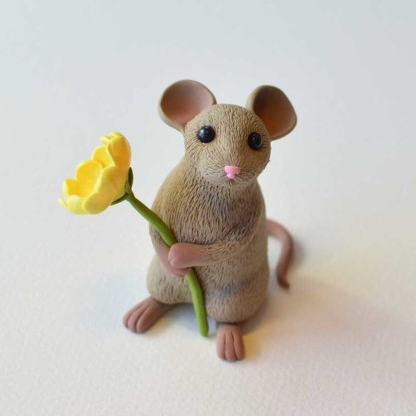
Next, simply press the looped end into the centre of the back of the flower. Use a small ball tool to gently smooth the join in the clay. Don’t press too hard, or you may squash the front of your daisy! Position the flower between the mouse’s paws and fold its arms over the stem so the mouse is holding its flower.
-
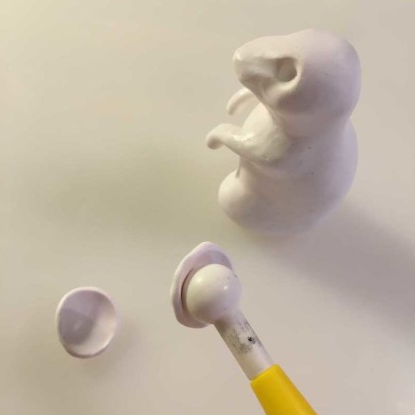
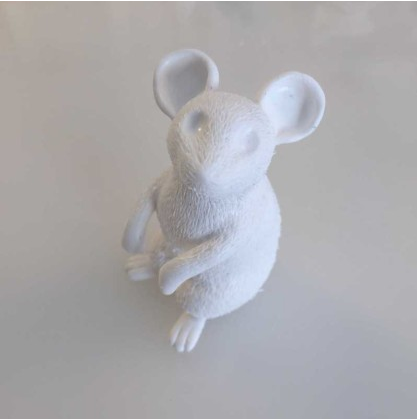
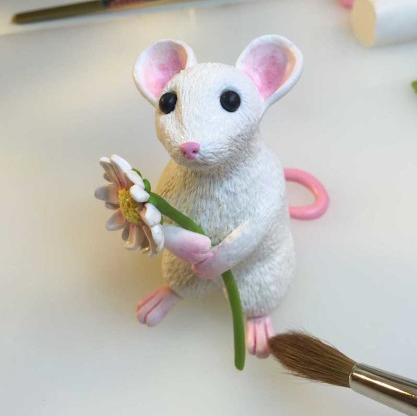
Last thing to do before cooking is to mix a light pink chalk powder to dust onto your mouse’s paws, feet and ears. I used a bigger, fluffier brush for this. Try and get a nice smooth transition from white to pink by dabbing gently. You may also need to touch up areas of the fur that have become flattened through handling.
-
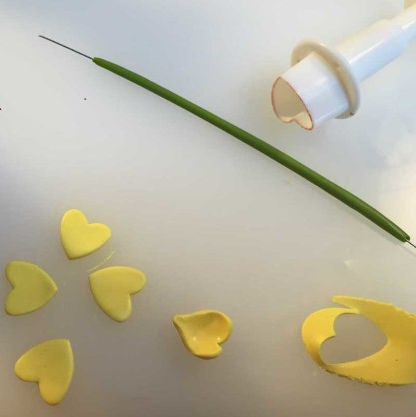
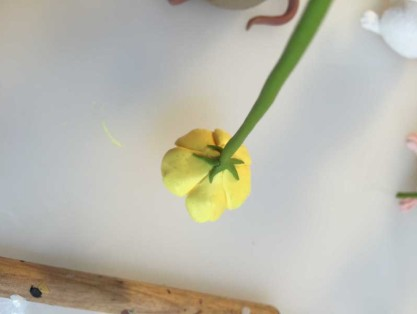
To make the buttercup, which my brown mouse is holding, I followed the same steps for making the stem, including making a little loop in the wire at one end. Buttercups usually have 5 heart shaped petals, so I cut out 5 little hearts using a small heart shaped cutter.
-
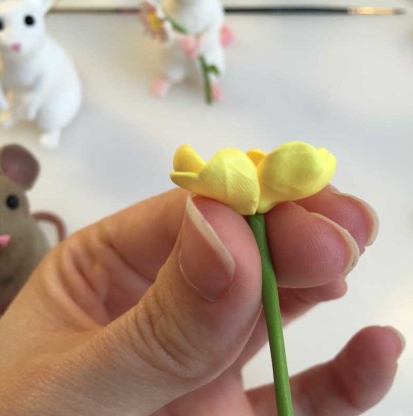
I then shaped the petals, using the same technique as I used for shaping the daisy petals, placing each petal in turn on my palm and shaping it with my ball tool.
-
Then I arranged the petals evenly around the centre, pinching the petals into the stem slightly by rolling the stem between my fingertips.
-
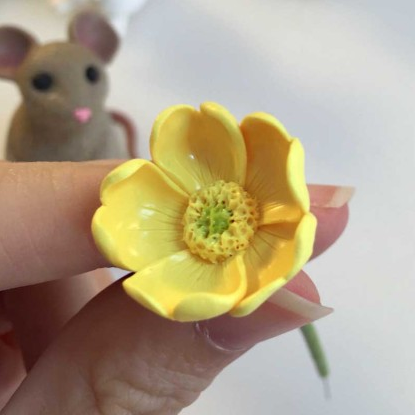
Next I added a very little dot of Wasabi coloured clay to the centre of the flower, and then textured it as with the daisy.
-
I then added five little leafy bits to underside of the flower.
-
Once the models are cooked, you can add touches of varnish to their eyes to make them shine, as well as a light coating to the petals of the flowers.


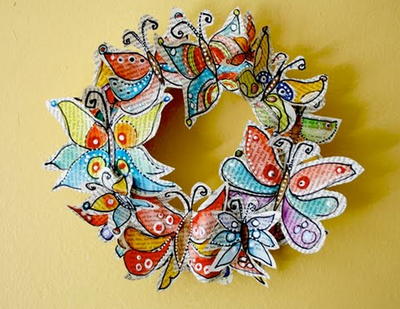
Read NextRecycled Butterfly Wreath
Your Recently Viewed Projects
Thanks for your comment. Don't forget to share!
EditorLP
Sep 01, 2017
These are so cute I can't even handle it. When I first saw them, I thought they would be really hard to make, but if I follow the step-by-step instructions, I think I could do it!
KathrynAllison
Sep 01, 2017
I'm going to pass along this project to my mom, because she has a beautiful garden and she loves adding tiny accents like these darling mice.
Report Inappropriate Comment
Are you sure you would like to report this comment? It will be flagged for our moderators to take action.
Thank you for taking the time to improve the content on our site.