Beautiful Graphic DIY Christmas Card
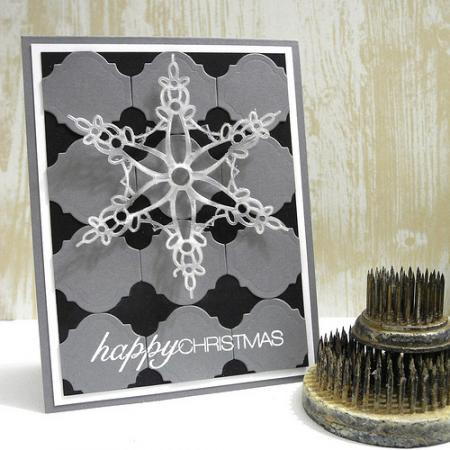
DIY holiday cards are a great way to show your family and friends that you are thinking of them during the holiday season. This Beautiful Graphic DIY Christmas Card tutorial will teach you how to make a very unique and visually interesting card. The geometrical pattern of the background as well as the snowflake die create a lovely card with a lot of texture. The colors of this holiday greeting card also make it feel modern. This easy paper craft is so much better than anything you could buy at the store.
Estimated Cost$31+
Time to CompleteUnder an hour
Primary TechniquePaper Crafts

HolidayChristmas
Materials List
- Snowflake Bliss
- Labels Forty-One
- Tool 'n One
- IMAGINE Crafts/Tsukineko: VersaMagic Ink and Vertigo Sheet
- SCRAPBOOK ADHESIVES BY 3L: Crafty Power Tape
- WorldWin Papers: ColorMates Smooth & Silky Cardstock (White, Slate, and Black)
- Sentiment Stamp
- Clear Foam Tape
Instructions
-
Create a card base with slate cardstock. Trim a white panel, adhere to card base.
-
Trim a black panel smaller than the white panel.
-
Cut/Emboss slate cardstock with Labels Forty-One Die #2 (the smallest size die is #1) multiple times, using the Grand Calibur Machine. I find it helpful to cut a few extras in case you need them.
-
Create a background pattern with the label die cuts touching top to bottom and side to side. Adhere.
-
Trim the overhanging portions of the labels to be flush with the black panel. Adhere black panel to card.
-
Cut/Emboss Snowflake Bliss Die #4 with the Vertigo material (a translucent patterned material). Use the Tool 'n One to remove the small pieces from the cut.
-
Adhere the snowflake die cut to the card.
-
Stamp and emboss the sentiment at the bottom of the card.
Read Next5 Minute Stitched Christmas Cards

