Adorable Family Fun Halloween Frame
Learn how to make a picture frame with the Adorable Family Fun Halloween Frame. Create a DIY picture frame to capture all your most cherished moments with the family. Whether your favorite memories are from apple picking, pumpkin decorating or going trick-or-treating together, this frame is the perfect way to celebrate those memories. Kids don't stay young forever, so it's important to take as many pictures as you can. Now, with DIY Halloween decorations like this frame, you'll have plenty of uses for all your family photos.
Materials:
Clays:
- Premo! Sculpey®, 2 oz , Purple - 1 block
- Sculpey® III, 2 oz , Just Orange - 1 block
- Sculpey® III, 2 oz , Granny Smith - 1 block
- Sculpey® III, 2 oz, Glow in the Dark - 1 block
Tools:
- Sculpey® Clay Conditioning Machine
- Sculpey Acrylic Roller
- Sculpey Super Slicer
Additional Supplies:
- Coordinating Glitter
- Coordinating Ribbon
- Silicone Glue
- Toothpick
- Cardstock
- Ruler
- Scissors
Instructions:
- Do not use unbaked clay on unprotected furniture or finished surfaces. Start with clean hands and work surface area. Good work surfaces include wax paper, metal baking sheet, or disposable foil. Knead clay until soft and smooth. For best results, clean your hands in between colors. Shape clay, pressing pieces together firmly. Bake on a metal surface at 275 °F (130 °C) for 15 minutes per 1/4" (6 mm). For best baking results, use an oven thermometer. DO NOT USE MICROWAVE OVEN. DO NOT EXCEED THE ABOVE TEMPERATURE OR RECOMMENDED BAKING TIME. Wash hands after use. Baking should be completed by an adult.
- Cut out a 6.5" X 6.5" square template and a 1.5" X 5" template from the card stock.
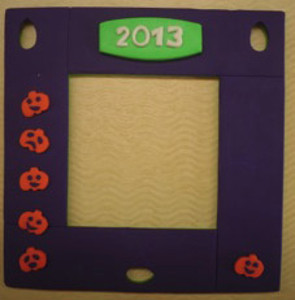
- Repeat the steps above for making a frame. Use Granny Smith for the base color and Purple on top. Cut out two holes at the top corners and one at the bottom of the frame for the ribbon. • Use the pumpkin Mini Cutter to cut out six pieces From Just Orange. With Purple clay make little eyes and mouths for the pumpkins. • Use the Alphabet push mold to mold the numbers 2 0 1 3 from Glow in the Dark. Roll out a sheet Granny Smith through the Clay Conditioning Machine to 1/8" thick. Place the numbers on top and cut out around them with the flexible blade. Place the tag at the top of the frame.
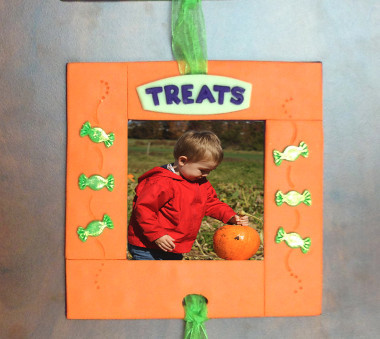
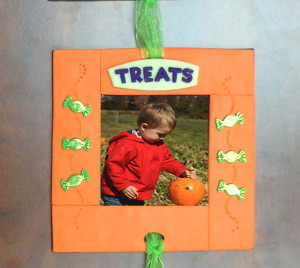
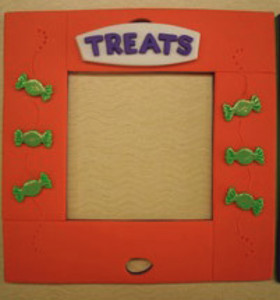
- Repeat the steps above for making a frame. Use Purple for the base color and Just Orange on top. Cut out holes at the top and bottom of the frame for the ribbon. • Use the candy shape Mini Cutter to cut out six pieces from Granny Smith. Use your finger to dab glitter on the top of each candy shape. Use the toothpick to make little details on the edges of the candy wrapper so it looks wrapped. Make little designs between the candies. • Use the Alphabet push mold to mold the letters T R E A T S from Purple. Roll out a sheet Glow in the Dark through the Clay Conditioning Machine to 1/8" thick. Place the letters on top and cut out around them with the flexible blade. Place the tag at the top of the frame making sure that enough of the hole at the top is kept clear so that you can thread the ribbon through it later.
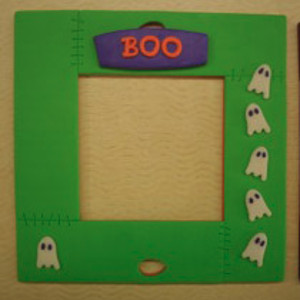
- Create the base of the "BOO" frame by rolling out a sheet of Just Orange through the Clay Conditioning Machine to 1/8" thick. Use the 1.5" X 5" template, cut out four pieces. • Lay the Just Orange strips on the square template making a frame shape. Push the seams together with your fingers. • Roll out a sheet Granny Smith through the Clay Conditioning Machine to 1/8" thick. Use the 1.5" X 5" template, cut out four pieces. • Lay the Granny Smith pieces on top of the Just Orange pieces so that the seams aren’t in the same place as your bottom layer. Use the Acrylic Roller to gently roll over the frame in each direction to make sure they are well stuck together. Use the Super Slicer to trim any unevenness around the outside of the frame if necessary. Rub all the edges gently with your finger just to smooth off the sharp corners. • Roll out a sheet Glow in the Dark through the Clay Conditioning Machine to 1/8" thick. Use the ghost Mini Cutter to cut out six little ghosts. Decorate the frame with the ghosts. Add little bits of Purple for eyes. • Use the toothpick to make little stitch marks across the seams of the frame. • Use the egg Mini Cutter to cut out an round shape at the top and bottom center of the frame (about 1/4" away from the edge). This will make a hole for the ribbon to be strung through. • Use the Alphabet push mold to make the word B O O from Just Orange. Roll out a sheet Purple through the Clay Conditioning Machine to 1/8" thick. Place the B O O letters on the Purple clay. Use the Super Slicer flexible blade to cut around the letters holding the blade at curve. Place the tag at the top of the frame making sure that enough of the hole at the top is kept clear so that you can thread the ribbon through it later.
- Bake the frames according to the above directions and allow to cool. After the frames are baked tie them together with ribbon. Cut a 24" ribbon for the top. Secure it to the 2013 frame by tying one end of the ribbon through each hole. • Cut 24" of ribbon to hook the three frames together. Glue one end of the ribbon behind the 2013 frame and then thread the ribbon through the hole at the bottom from back to front. • Thread the other end of the ribbon from front to back through the top hole of the TREATS frame. Thread the ribbon through the bottom hole of the TREATS frame from back to front. • Thread the ribbon through the top hole of the BOO frame from front to back and through the bottom hole from back to front. Thread the ribbon back through the bottom hole again and secure on the back with silicone glue. Trim the ribbon at the bottom as desired.
Read NextDay of the Dead Garland

