Wooden Decorative Easter Blocks
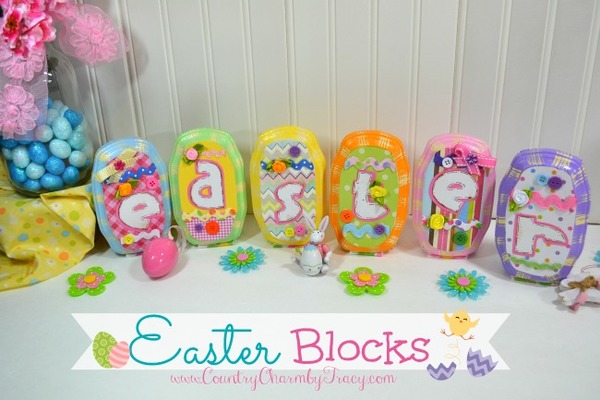
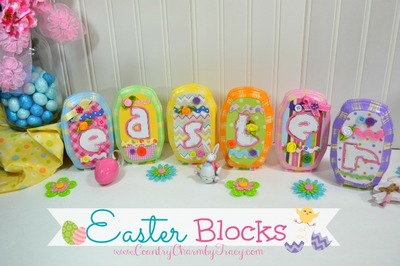
Turn small wood plaques into adorable Easter decorations with paint, scrapbook paper, embellishments and a little imagination! If you are looking for a fun way to add a homemade touch to your Easter celebration, then these Wooden Decorative Easter Blocks will fit right in. These blocks will be a great conversation starter and all your friends will want to know how you made them. You can complete this project in an evening, so it's great as a last minute addition to your decorations. These decorative wooden blocks can add just the right amount of personality to your home, and they store easy for use in years to come!
Estimated CostUnder $10
Time to CompleteIn an evening
Primary TechniqueWood Crafts

HolidayEaster
Materials List
- wood plaques in various shapes or patterns
- paint in spring colors
- scrapbook paper
- embellishments (ric rack, buttons, flowers, bling, ribbon)
- wood glue
- extra wood blocks for back support
- Cricut die cutting machine
- Robotz Cricut cartridge
- glossy varnish
- brown ink
- ultra fine black sharpie marker
Instructions
-
Cut one side of plaque with saw for flat bottom.
-
Paint plaques in spring colors, set aside to dry.
-
Use thin white paper or tracing paper to make a pattern indention of the face of your plaque. This will give you the pattern to draw and cut out of various scrapbook paper. Adhere to painted plaques with wood glue.
-
Cut out letters on Cricut machine using Robotz cartridge. Ink edges, doodle with black marker.
-
Place letters on blocks and seal with varnish.
-
Glue small pieces of wood to back of block for extra stability. Some of my blocks were still a little wobbly so I added a piece of felt to bottom. Works great!
-
Embellish with ric rack, buttons, flowers, ribbon, bling, etc.
Read NextSimple Easter DIY Centerpiece

