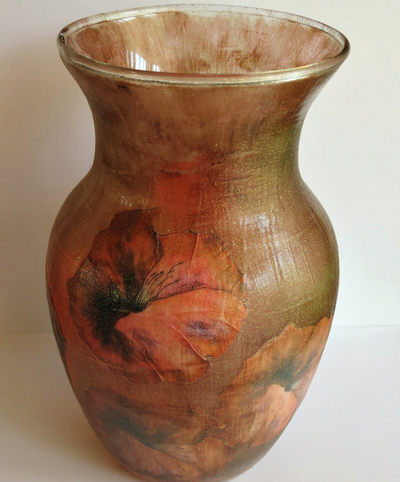
Lovely Hibiscus Shadow Vase
If you are looking for DIY Christmas present ideas, this Lovely Hibiscus Shadow Vase is a fantastic option! You will learn how to decoupage Hibiscus flowers onto a vase to create upcycled home decor. The tutorial comes with a free printable sheet of Hibiscus flowers you can use. Your family and friends will love such a thoughtful and beautiful gift that they can use in their homes. Flowers always brighten winter days, so you cannot go wrong with this DIY flower vase.

Materials:
- Hibiscus Flower Template, 2 sheets
- Classic clear glass vase
- Deco Art glue
- Heritage Satin Modge Podge
- Water-based varnish
- Versacolor brown pigment ink stamp pad
- Revlon Flex Flexi hairspray
- Spray & Sparkle gold glitter varnish
- Sandpaper with a fine grit (800-1000)
- Old newspapers to protect the working area
- An old cloth
- 10/32” paint brush
- Standard scissors
- Optional: hairdryer
Instructions:
- Wash the vase in warm soapy water and then dry it thoroughly with a cloth.
- Cut out the paper flowers. Spray the Hibiscus Flower Template cutouts with the hairspray and allow to dry. The hairspray will act as a fixative, preventing the ink from running. It will also cause the ink to draw into the paper, causing the back of the paper to turn pink. When the flowers are added to the vase, it will look more interesting than using flowers with a white background.

- Cut out the flowers and decide how they will be arranged on the vase.
- With the 10/32” brush, paint a substantial amount of Deco Art Glue to the back of the first flower. Turn the flower around and put it in position on the vase, but do not press it down.
- With the brush, spread glue on the front of the flower, lightly applying pressure so that it will stick to the vase.
- Starting at the middle of the flower, rub from the inside toward the outside and work out all the air bubbles.
- Remove excess glue from the back of the flower. Use an old cloth to clear any excess glue from the vase. Be careful not to tear the flower when wiping off the excess glue.
- Repeat steps 5 through 6 with additional flowers until the design has been completed.
- Allow the flowers to air dry thoroughly. One can also user a hairdryer to dry the flowers, but do not use the highest heat setting on the hairdryer as the vase might become too hot to handle.
- With the 10/32” brush, paint a thin layer of Modge Podge over the vase. The Modge Podge will protect the pictures and give the product a smoother finish. Only apply the Modge Podge up to the upper lip of the vase.
- Allow the vase to air dry, or dry thoroughly with the hairdryer.
- Gently wet sand the Modge Podge and allow to dry again.
- Repeat steps 9 through 11.
- You need to apply at least four coats of Modge Podge, but remember that with every layer the direction in which the Modge Podge is applied must be changed from horizontal to vertical to horizontal, etc. Also, remember that after every layer of Modge Podge, the vase must be allowed to air dry and then the Modge Podge must be wet sanded after every layer.
- Remove the spongy foam pad from the ink stamp pad’s plastic backing. Fold the spongy foam in half and use it to give the vase a wash with the brown pigment ink. Allow to dry thoroughly.
- Apply a final coat of Modge Podge and allow the vase to dry. While adding this layer of Modge Podge, regularly clean the brush on a piece of newspaper, as some of the ink from the wash will rub off onto the brush. Allow the vase to air dry again.
- Add a layer of water-based varnish to the vase and allow it to air dry.
-
Add the finishing touches by spraying the vase with the glitter varnish. Remember to work in a well-ventilated area when spraying the varnish. Allow the vase to dry thoroughly.


Note: To clean, wipe the vase gently with a damp cloth and do not use strong detergents. The vase is not dishwasher safe.
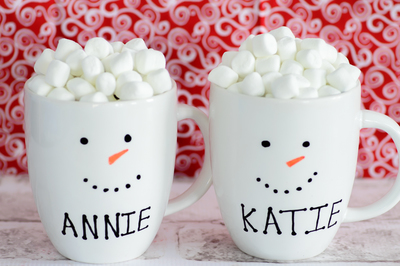
Read NextAdorable Personalized Snowman Mugs