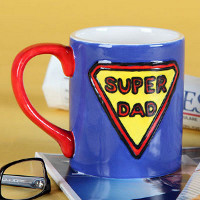
DIY Coffee Mug for Dad
Christmas gift for dad that have some personal meaning can be hard to come by, and difficult to create. That’s no reason to default to a tie or tools; this tutorial for a DIY Coffee Mug for Dad will help you create a personalized Christmas gift with ease. Show your father that he means the world to you when you make his Christmas gift from scratch. It’s the thought that counts, and it doesn’t get more thoughtful than handmade Christmas gifts. This is the perfect tutorial for mom or grandma to work on with the little ones, too.

Materials:
- Duncan® Concepts® Underglazes for Bisque
- CN 112 Bright Delft
- CN 501 Neon Yellow
- CN 507 Neon Red
- Dinnerware Bisque Designs
- 12-oz Plain Mug 3.75" x 3.25" x 5" (21437)
- Signature Brushes
- SB 802 No. 1 Liner
- SB 806 No. 6 Round
- SB 807 No. 6 Fan Glaze
- Brush Cleaner
- Duncan® French Dimensions™
- FD 254 Black Licorice
- Mask 'n Peel™
- Duncan® Pure Brilliance® Clear Glaze
- Foil or foam plate for palette
- Paper cup
- Clay carbon transfer paper
- Pencil
- Paper towels
- Container for water
- Potter’s sponge
- Patterns
- Pattern
Instructions:
- Wipe bisque with a damp sponge to remove any dust.
- Pour some Pure Brilliance into mug and swirl around to coat entire inside of mug. Pour out excess glaze into a paper cup and wipe away any drips with a damp sponge.
- Place pattern on side of mug with clay carbon transfer paper underneath. Trace over outline only.
- Condition No. 6 Round with Brush Cleaner, then use conditioned brush to apply Mask ‘n Peel over design. Let dry and immediately clean brush after applying Mask ‘n Peel.
- Use the Fan Glaze brush to apply three coats of Bright Delft to outside of mug, brush color over masked design. Use a paper towel to wipe away some of the pooled color from masking.
- After the third coat has lost its sheen but before it completely dries, peel off the masking and clean any color crumbles or jagged edges with a damp brush. Let third coat completely dry.
- Use the No. 6 Round to apply three coats of Neon Red onto mug handle. Let dry.
- Fill in the design with three coats of Neon Yellow and let dry completely.
- Place clay carbon transfer paper back over design section and align pattern on top. Gently trace over design lines and wording to transfer onto Neon Yellow diamond pattern, being careful not to scratch color underneath.
- Load the No. 1 Liner with Neon Red and brush three coats onto outline and wording as shown. Let dry completely.
- Test flow of Black Licorice French Dimensions on paper towel. Outline design and wording with Black Licorice. Let dry completely.
- Brush one coat of Pure Brilliance onto outside of mug and let dry. Brush two coats onto bottom of mug. Let dry completely.
- Stilt and fire to cone 06.
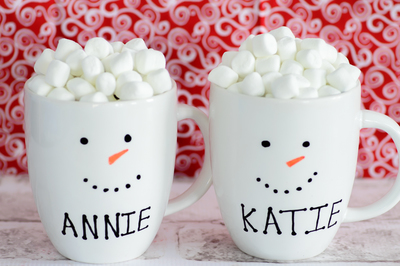
Read NextAdorable Personalized Snowman Mugs