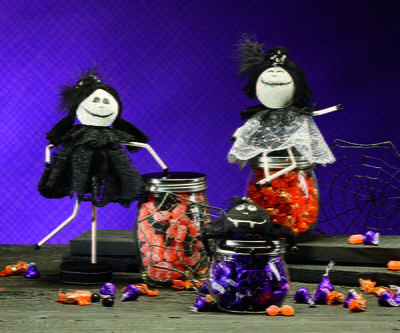
Candy Jar Skeletons
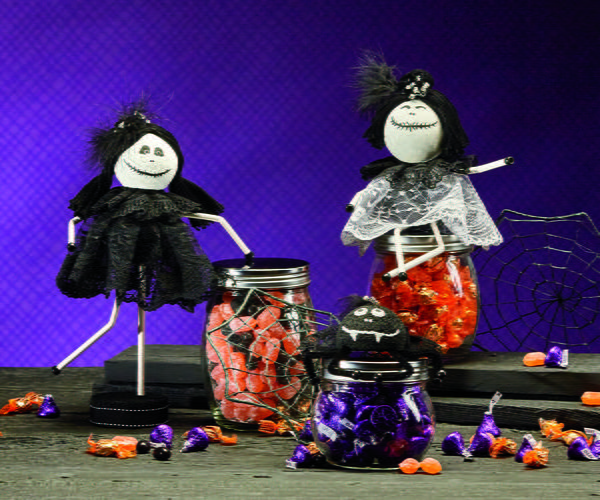
Store your snacks and Halloween treats in style with the help of these cute candy jar skeletons. Create little counter top companions your kids, family, and friends will love for the spookiest season of the year. A cute little companion like this makes a great addition to your counter top, or prop when you are handing candy out to the neighborhood trick-or-treaters. These crafty creatures are a fun and unique way to get into the spirit of autumn, and make simply adorable homemade Halloween decorations.
Primary TechniqueGeneral Crafts

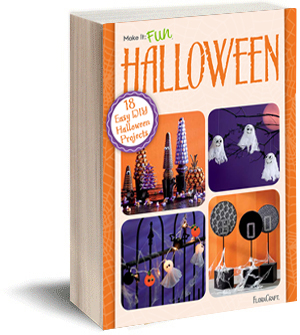
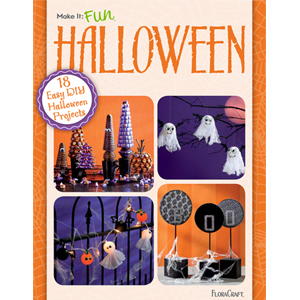
See this and more great Halloween decor ideas in our new eBook, 18 Easy DIY Halloween Projects.
Materials:
FloraCraft® Make It: Fun® Foam:
- Balls: (3) 2.5” and (2) 3”
- Disc: 3”
Other Materials:
- FloraCraft Smooth Finish®
- Chalk Paint: Charcoal and White
- Acrylic Paint: Flat Black
- 4” Gathered Lace: Black and Grey
- 1” Gathered Lace: Black
- Crochet Thread: Black
- (4) Thin Wood Dowels
- Duct Tape: White
- (4) Chenille Stems: Black
- Jeweled Accessory Picks
- (16) Pony Beads: Black
- Straight Pins
Tools:
- Make It: Fun ® Foam Cutter or Serrated Knife
- Low-Temp Glue Gun
- Scissors
- Spatula or Small Putty Knife
- Paint Brushes: 1” Flat and Fine Detail Brush
- Fine Sandpaper
- Craft Stick
- Wire Cutters
Instructions:
- Use spatula or putty knife to apply a coat of Smooth Finish® to two 2.5” balls for the heads. Tip: Use a craft stick inserted into the ball as a handle. Let first coat dry and sand lightly. Apply a second coat, let dry and lightly sand again.

- Paint the smooth balls white. Paint the 3” balls grey for the bodies. Cut a small flat spot off the bottom of the remaining 2.5” ball and paint black for the spider. Set aside to dry.

- Insert the other end of the craft stick from the heads into the top of the bodies and glue in place.

- Pin the 4” gathered lace around the top of the bodies. Pin pleats in the lace as you go to create ruffles. Pin the 1” black lace around the necks in the same way.

- Wrap a generous amount of black thread around your hand or an object that is about 4 ½” across.

- Tie a knot through the center to gather.

- For the grey skeleton, tie a small bun in one end of the loops and then cut the opposite side of the loops to create a tassel. For the black skeleton, loop the string the same way.

- Tie together then cut the loops apart and tie off the ends for pony tails about 1.5” up from each end.

- Cut eight 6” lengths of wood dowel using the wire cutters. Cut eight 6” strips of white duct tape and wrap around the dowel to cover.

- Break the dowels to create the elbows and knees. Glue a black pony bead to the end of each dowel for the hands and feet. Glue the arms and legs into the bodies.

- Glue the hair to the heads and glue on jeweled accessory embellishments. Positioning the hair first gives you a guide for where to paint the face. Paint on the face and let dry. You can first lightly draw the face in pencil and then trace with paint.

- Paint the spider's face using the white paint and let dry. Cut the black chenille stems in half. Glue a pony bead to one end of each of the eight stem pieces for the spider’s feet. Glue the legs into the sides of the spider. Pin a piece of black lace around the spider’s waist to finish. Display skeletons with treat jars.