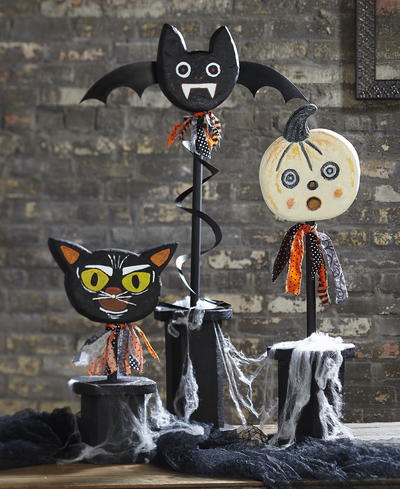
Vintage Topiaries

Capture some retro charm with these Vintage Topiaries. These DIY Halloween decorations are sure to be the talk of your next Halloween party. With these fun topiaries, you can lend your house some character while also decorating for Halloween. This Halloween craft is festive enough for the Halloween spirit, but cute enough that it won't scare the little ones, making it perfect for a family-friendly home. Plus, even novice crafters can follow these detailed instructions and make their own topiaries. Go vintage this Halloween and you'll never go back!
Time to CompleteWeekend project
MaterialsCraft Foam

SeasonFall
HolidayHalloween
Materials List
- FloraCraft® Make It: Fun® Foam: 1 Sheet (2” x 12” x 36”), Six Discs (8”), Five Cubes: (5”)
- FloraCraft Smooth Finish®
- Acrylic Paint: Black, White, Yellow, Orange and Off White
- 3/4” Wood Dowels: 9”, 16” and 24” Lengths
- Poster Board: Black
- Fabric Scraps: Coordinating Colors
- Make It: Fun® Foam Tools
- Low-Temp Glue Gun
- Serrated Knife
- Fine Grit Sandpaper
- Scissors
- Paint Brushes
- Hand Saw
- Sequin Pins
Instructions:
-
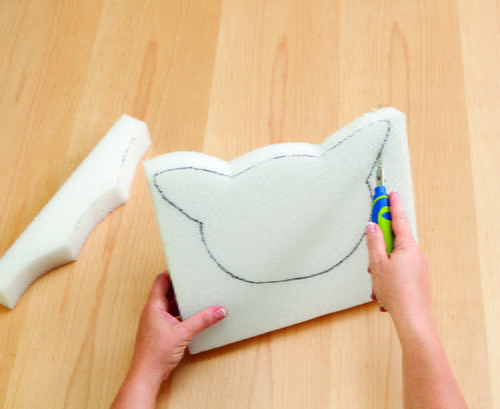
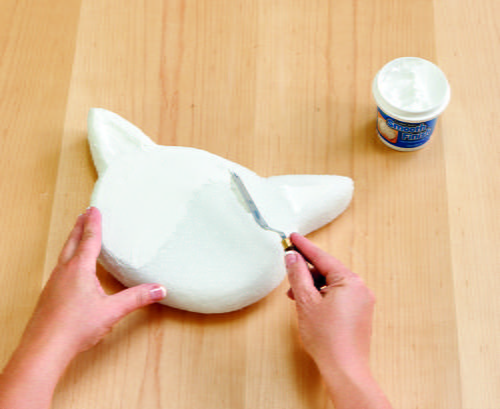
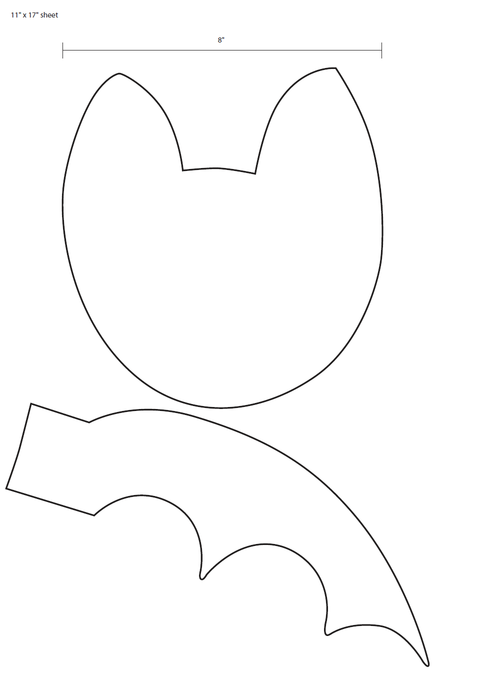
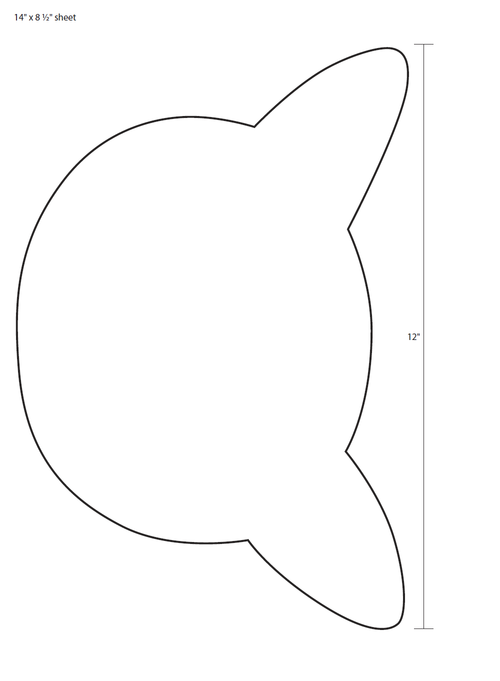
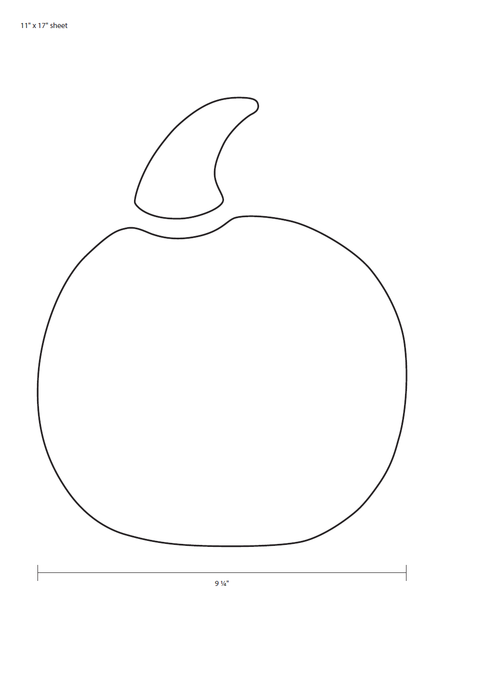
Print and cut out the templates. Trace templates onto the foam sheet and cut out the shapes using the serrated knife.
-
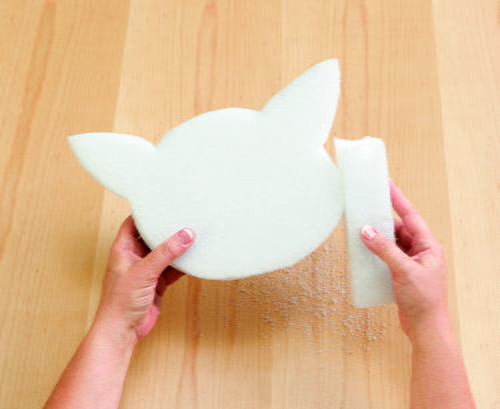
Use the scrap pieces of foam as sanding blocks to “sand” the edges of the shapes smooth and slightly rounded.
-
Use the scribe tool to indent the areas around the eyes, nose, and mouth of the pumpkin and to create the grooves in the top of the pumpkin and the stem. Use the scribe to also indent the cat’s ears.
-
Form small scraps of foam into rounded half balls and glue them to the pumpkin’s face for cheeks.
-
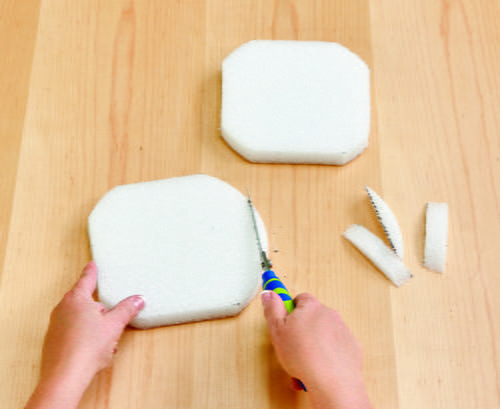
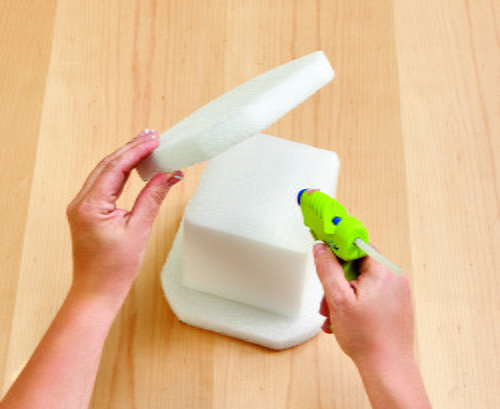
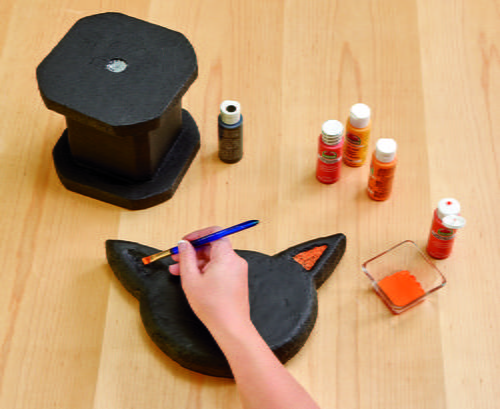
To create the stands, cut one cube exactly in half using the serrated knife. For the tallest stand, glue two cubes stacked together and glue one half cube on top of the two. For the middle sized stand, glue the other half cube on top of another cube. The last cube is for the smallest stand. Bevel the corners of all the cubes by cutting off about a 1” flat edge on each corner. Use the serrated knife to cut a 4” wide flat edge off four sides of each disc. Glue the discs to the tops and bottoms of the cubes, being sure to line up the flat edge of the disc with the flat side of the cube.
-
Apply Smooth Finish® to all foam parts to completely cover. Once dry, sand smooth and apply a second coat. Sand smooth again once dry and set aside.
-
Paint the stands, dowels, cat and bat black and let dry. Paint the indented areas of the pumpkin grooves, the eyes, nose and mouth and the stem black. Let dry. Paint the face on the cat and bat as shown and paint the pumpkin off white. Use a smaller brush to apply a little off white paint over top of the black indented areas and the stem using a dry brushing technique to give a distressed look. Dry brush a little orange paint around the mouth, cheeks and face of the pumpkin to highlight.
-
Cut out the wings from the poster board following the template. Cut out an 8” circle from the poster board as well, and cut a spiral pattern into the 8” circle. Glue the wings in place on the back of the bat.
-
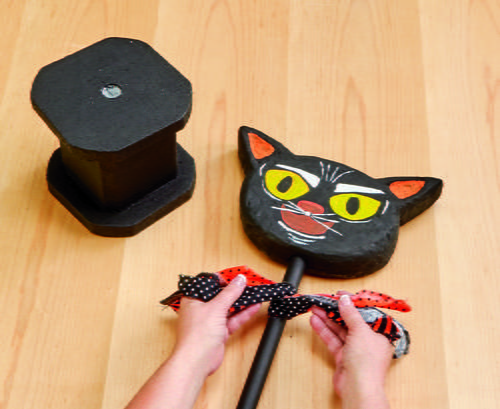
Firmly insert the dowels about 2 inches into the bottom of the heads making sure they are straight. Remove the dowels. Firmly insert the dowels straight into the tops of the stands about 3”. Glue the dowels in place in the stands and glue the shapes to the tops of the dowels. Glue the paper spiral cascading down the tallest dowel.
-
Tear strips of fabric and tie around the tops of the dowels to embellish.
Printable Templates
-
Bat Template
-
Cat Template
-
Jack O' Lantern Template
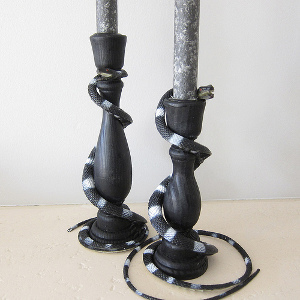
Read NextSnake Wrapped Candle Holders