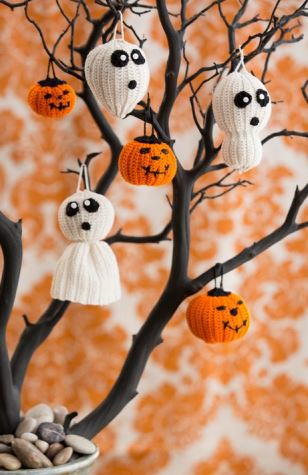
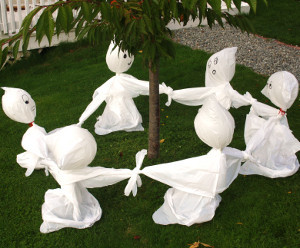
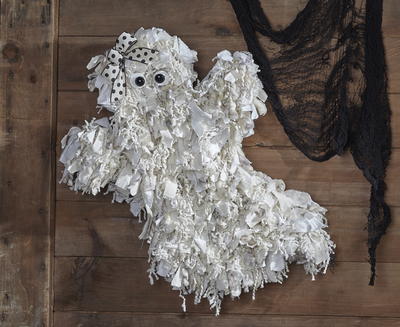
Shaggy Chic Ghost

Who ever said Halloween ghost crafts couldn't be trendy? This Shabby Chic Ghost is perfect for the crafter with a sense of style. This easy Halloween craft will add a touch of class to any house, and it's sure to be an instant hit with friends and family. A DIY Halloween decoration this cute is easier to make than it looks; crafters of all experience levels will be able to create their very own chic ghost. This Halloween craft proves that Halloween decorations don't have to be scary to be fun. Go ahead and make a trendy ghost craft this Halloween!
Time to CompleteIn an evening
MaterialsCraft Foam

SeasonFall
HolidayHalloween
Materials List
- FloraCraft® Make It: Fun® Foam: Sheet: (2) 1” x 12” x 18”
- (1/4 Yd.) Bleached Muslin
- (1/4 Yd.) Natural Muslin
- Bulky Homespun Yarn: Multi Color Cream/Mocha
- Fringed Yarn: Cream
- Wired Ribbon: Cream/Black Dot
- (2) White Buttons: 1.5”
- (2) 25mm Half Round Eyes: Black
- Heavy Gauge Wire
- Make It: Fun® Foam Tools
- Low-Temp Glue Gun
- Scissors
- Serrated Knife
- Wire Cutters
Instructions:
-
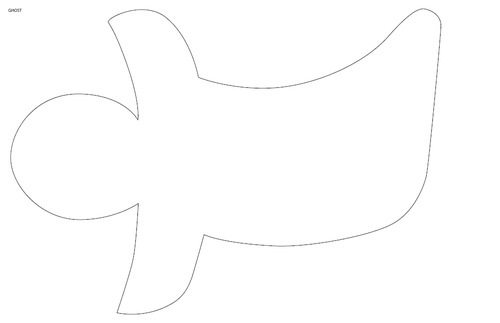
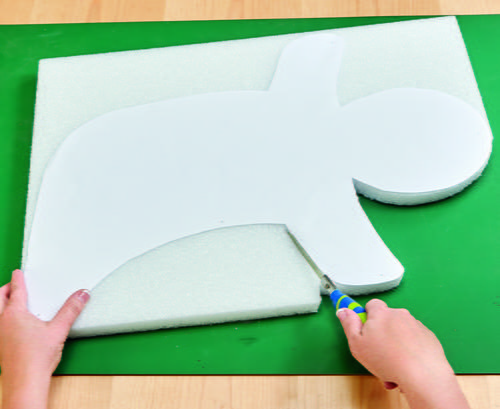
Glue the two sheets together along the 18” sides. Print and cut out the template and pin it to the foam. Use the serrated knife to cut out the shape of the ghost.
-
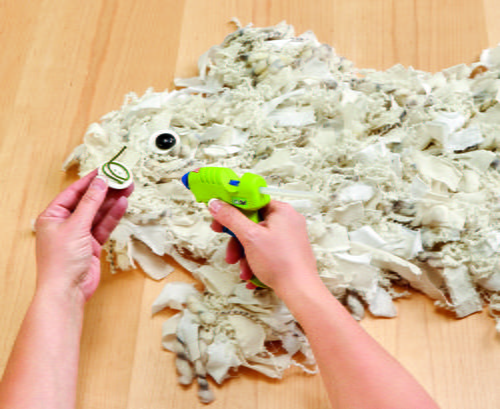
Tear the muslin fabrics into 1” strips. Cut each of the strips into 9” lengths. Cut the fringed and bulky yarns into several 9” lengths as well. You can cut more as you go along.
-
Start at the bottom of the ghost. Lay the center of a fabric strip about ½” in from the edge of the foam. Use the tuck tool to tuck the center of the fabric strip into the foam leaving the ends hanging free. Continue tucking fabric strips and yarn lengths along the bottom edge of the foam alternating to ensure equal amounts of each. Move up about ½” from this bottom row. Begin tucking in a second row overlapping the first. Repeat this technique to completely cover the front and sides of the ghost.
-
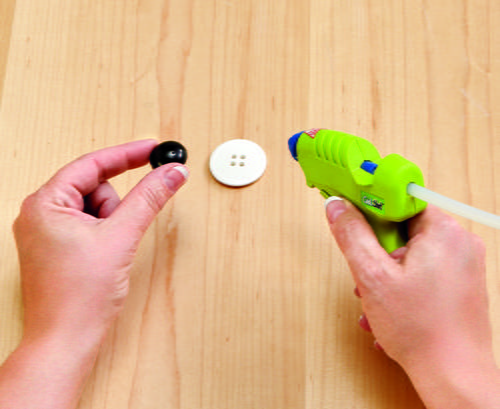
Glue the black eyes to the white buttons. Cut two 6” lengths of wire. Bend a small circle into one end of each wire, leaving about a 2” straight end. Glue the circle portions of the wire to the back of each eye. Insert the straight end of the wires into the face of the ghost.
-
Make a bow with the ribbon and glue it to the top of the ghost’s head.

Read NextMesh Pumpkin Door Decor
Your Recently Viewed Projects
Thanks for your comment. Don't forget to share!
Sigo
Sep 27, 2018
That is the cutest ghost I have ever seen! I love that shaggy look and the technique seems so easy to do. Thanks for sharing!
Report Inappropriate Comment
Are you sure you would like to report this comment? It will be flagged for our moderators to take action.
Thank you for taking the time to improve the content on our site.