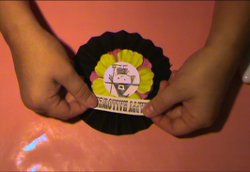
Halloween Pendant Tutorial
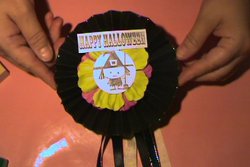
This paper craft is one of those easy Halloween decorations you'll find many uses for. Whether you put it on a garland or stick it to a Halloween candy bag, this pendant is a cute addition to any project! Just follow this Halloween Pendant Tutorial for the how-to! If you want to see how it's done, please visit our YouTube channel.
For more projects by Carlene, check out her designer profile page!
Materials:
- 1 ¾” circle punch
- Bonefolder or score board
- Liquid glitter
- White cardstock
- Two 2 ½” x 12” black cardstock strips
- Black inkpad
- 2 large flat flowers
- Halloween stamps
- 3 coordinating ribbons 18” long
- Liquid glue or hot glue
- Glue dots
Instructions:
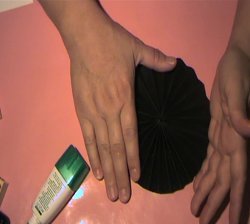
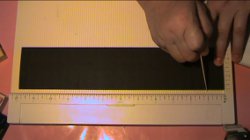
1. Score black 2 ½” x 12” pieces at ½” intervals.
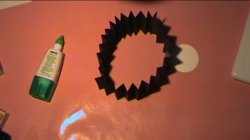
2. Connect one of the ends to the other piece. Then connect the last 2 ends together to form a circle.
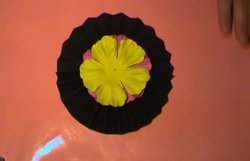
3. Punch white cardstock one time using your circle punch.
4. Center white circle under the black pleated circle.
5. Place glue on top of white circle and push black circle down onto glue. Hold until dry.

6. Glue and layer two flat flowers to the front your pleated circle. The back has the white circle.
7. Using your inkpad; ink and stamp your halloween image onto white cardstock.
Optional: Color your stamped image.
8. Punch out image using your circle punch. If image is too large, you can cut out image by hand.
9. Glue image on top of your layered flowers.
10. Take your three coordinating ribbons and make a knot in the middle to tie them all together.
11. Use a glue dot to adhere ribbons to back of your pendant.
12. Arrange ribbons to your liking and trim edges at an angle.
13. Optional-to hang, use another glue dot to apply a looped string to the back.
14. Apply liquid glitter to the edges of your pleated circle and let dry.
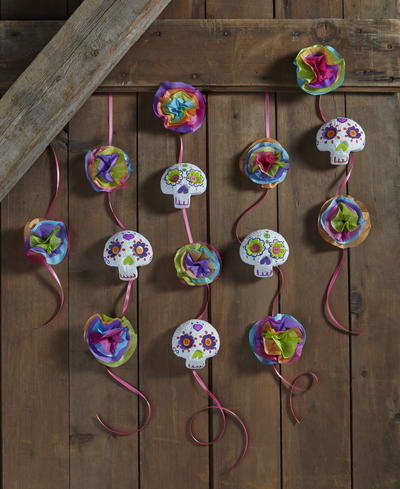
Read NextDay of the Dead Garland