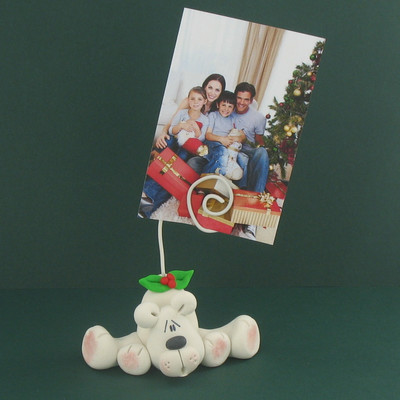
Bashful Little Polar Bear Photo Holder
Follow the Bashful Little Polar Bear Photo Holder tutorial to learn how to make a polar bear out of clay that will double as a DIY picture stand. It is an adorable way to display your favorite wintertime memories. This DIY winter decoration would be perfect on your mantelpiece this holiday season. The holidays are about remembering your favorite yuletide moments, and what better way to remember than with an adorable photo display? This awesome and easy winter clay craft will keep you smiling through all the coldest days this year.

Materials:
- Sculpey® III, 2 oz , White - 1 block
- Sculpey® III, 2 oz , Red Hot Red - 1 block
- Sculpey® III, 2 oz , Black - 1 block
- Tool Set
- Wood toothpick
- Pink chalk or eye makeup
- 20-gauge plastic-coated wire, 8” long
- Black permanent marker
Instructions:
- Preheat oven to 275 °F. Test temperature with an oven thermometer for perfectly cured clay. Condition all the clay by kneading it until it’s soft and smooth. You can also condition the clay by running it through the Clay Conditioning Machine for several passes on the widest setting. Fold the clay in half after each pass and insert the fold side into the rollers first.
- Make a 1" to 1/2" white ball into an egg shape for the body.
- Make two 3/4" white balls into tapered log shapes for the back legs.
- Make two 1/2" white balls into tapered log shapes for the front legs.

- Press legs on body.
- Insert a toothpick into the front of the body, leaving 1/2" exposed. Make 1" White ball into teardrop shape for head and push it on the exposed toothpick.
- Make two 1/4" white balls into teardrops and press them onto the head.
- Make a 1/4" white ball into an oval and press it onto the front of the head to make a muzzle.
- Make a 3/16" black ball and press it onto the muzzle for the nose.

- Use your tools to make facial features, ears, and toes.
- Make two 1/4" Lime balls into flat teardrops for leaves. Use your tools to make leaf veins.
- Make three 1/8" balls for the berries. Press leaves and berries on head.

- Brush eye shadow or chalk onto the bottoms of the feet.
- Shape one end of the wire into a large spiral that serves as a photo holder. Press the straight end into the body of the polar bear.
- Bake for 30 minutes according to the previous instructions.
- When it is cool, draw eyes and eyebrows on the clay with a black marker. Use white paint to make the cheek and eye highlights.
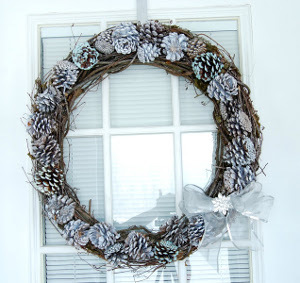
Read NextGlamorous Pine Cone Wreath