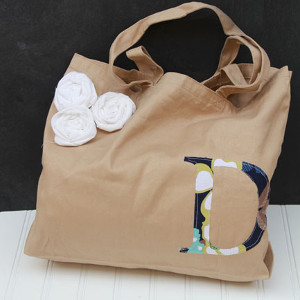
True Blue Bandana Purse
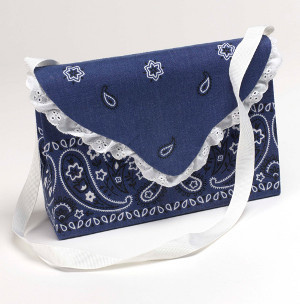
There is not another pattern more signature of summer than the paisley pattern of a bandana. What better way to make your own summer purse than with this all-American design? The True Blue Bandana Purse is easy to make and it will be sure to compliment any summer outfit that you can throw together. Get ready for the steamy sunshine of summer with this cute and unique summer craft idea for women.
Materials:
- Mod Podge ® Matte, 8 oz.
- Cereal box
- Bandana or any scrap fabric
- White eyelet lace or any scrap lace (13 inches)
- White grosgrain ribbon or any scrap ribbon (30 inches)
- 2 magnets – heavy duty
- Hot glue gun
- Ruler
Instructions:
- Use the ruler to draw lines as a guide for cutting your box. For the front of the purse, measure and draw a line 5¼” from the bottom of the box and cut across (save the scrap piece for later).
- For the sides of the purse, measure and draw a line 6¼” from the bottom of the box and cut across making a 1” flap then fold toward the inside of the purse (this will add extra strength).
- For the flap of the purse, measure and draw a line 5¼” from the bottom of the box (draw your line on the inside of the box back, but do not cut on this line); using the pattern (aligning the straight edge on the 5¼” line you just drew) trace the contoured edge of the flap and cut out creating the back of the purse with flap.
- Using the scrap piece of box and the pattern, trace and cut out flap (this will be used on the inside of the purse as reinforcement); set aside.
- Cut the bandana to fit the front part of the purse and half of the sides (leave 1 inch extending the bottom and at least a ½ inch extending the top); use Mod Podge to apply the fabric. Fold the extending ½” toward the inside of the purse and use Mod Podge to secure in place. Repeat with the extending 1” on the bottom.
- In the same manner, measure and cut the bandana to fit the back part and the sides of the purse; apply with Mod Podge, allow the fabric to extend about ½” beyond the flap then fold over and use Mod Podge to secure leaving a nice edge.
- Use the remaining piece of bandana to cover the additional flap (cut the fabric so that it extends ½” beyond all edges). Use Mod Podge to secure, then fold over the extended edges and secure with Mod Podge.
- Fold each side toward the inside of the purse creating a crease on each upper top portion of the sides (this will allow the flap to fold over nicely).
- Use hot glue to attach the ribbon (2” on each side) to the inside of the flap, creating a handle for the purse (when the flap is closed, the ribbon should come from the top of the purse).
- Use hot glue to secure the lace around the inside edge of the flap, then place the additional flap on the inside of the purse, covering the raw edges of the ribbon and lace; secure with hot glue.
- Use hot glue to attach both magnets; one on the inside of the flap and the other on the outside front of the purse.
- Allow project to dry for 24 hours before using.
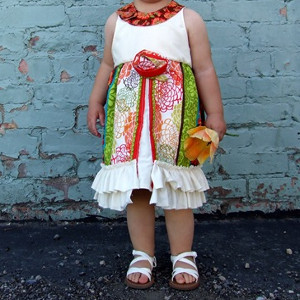
Read NextLittle Farmer's Market Dress
Your Recently Viewed Projects
Thanks for your comment. Don't forget to share!
JMitchell
Jun 03, 2013
This project has both advantages and disadvantages I don't have time to enumerate them all but will list a couple of the disadvantages Purses that get used get dirty If one uses the no-sew method described in the original project instructions washing this purse becomes a non-option because of the cereal box inside and the decoupage method of securing the fabric to the box The acidic nature of the cereal box is also of concern Using a layer of ModPodge on the outside of the purse might help keep it clean longer but will alter the look of the fabric which may or may not be a disadvantage I'm thinking of making this but will not do the ModPodge and cereal box method I'll sew mine instead using interfacing and a lining fabric second bandana to make it sturdier so that my version will be washable and possibly reversable It will…Read More not look much different than this although some stitches may be visible I'll also use a doubled length of ribbon for extra strength in the strap
Report Inappropriate Comment
Are you sure you would like to report this comment? It will be flagged for our moderators to take action.
Thank you for taking the time to improve the content on our site.