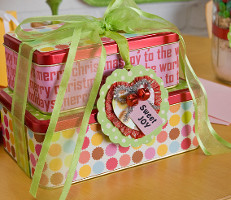
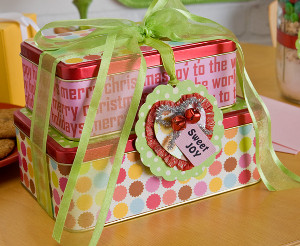
Cookie Exchange Tins
You make your own holiday cookies, so why not make your own holiday cookie tins? With this tutorial, you can make cookie exchange tins that everyone will admire. These Cookie Exchange Tins may seem like a lot of work, but they’re so much fun to make that you’ll hardly mind the effort they take. Perfect for cookie exchange parties, these tins are the perfect way to add a personal touch to your holiday cookie batch!
Materials:
- FolkArt ® Extreme Glitter™ - Hologram, 5 oz.
- Plaid ® Stencils - Value Packs - Letter Stencils - Old School, 1-1/2"
- Mod Podge ® Matte, 16 oz.
- 2 Cookie tins (One larger than the other)
- Coordinating scrapbook paper
- Scrap of pink cardstock
- Wide green ribbon
- 2 Small red bells
- Silver chenille stems
- Poster board or cardboard from cereal box
- Red paper streamer
- 3/8” Green ribbon
- Paper trimmer
- Hot glue
- Paint brush
- Scalloped/decorative scissors
Hole punch
Instructions:
- Measure and use Paper trimmer to cut coordinating papers to cover sides and tops of tins.
- Adhere papers to tins with Mod Podge. Allow to dry.
- Give tins a coat of Mod Podge to seal. Allow to dry. Set aside.
- Use Scraps of scrapbook papers to create a tag by using Mod Podge to glue two of those papers to poster board (Approximately one 7” square piece and one 3” square piece). Allow to dry.
- Draw a 3 1/4” circle (Use a ribbon spool as a template) on one of the papers and cut out with decorative scissors.
- Use heart template from Letter Stencil pack and draw a heart on the remaining paper; cut out.
- Cut a 18” strip of Paper streamer in half lengthwise. Gather the paper streamer creating a “ruffled” edge while attaching to back of heart cutout with Hot Glue (Refer to photo).
- Paint Hologram Extreme Glitter over heart cutout including ruffled edge.
- Feed Jingle bells through Silver chenille stem and create a bow; set aside. 10. Make a small tag with pink cardstock. Write or print “Sweet Joy” onto tag.
- Use Hot Glue to attach bow and tag to top center of heart. Glue heart to center of circle cut out.
- Punch a hole in the top of tag and attach a 7” piece of 3/8” green ribbon.
- Tie tins together with green ribbon hanging tag from bow. Note: Do not submerge tins in water. Wipe clean with a damp cloth.
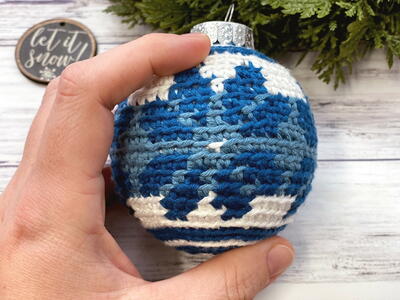
Read NextFair Isle Crochet Ornament