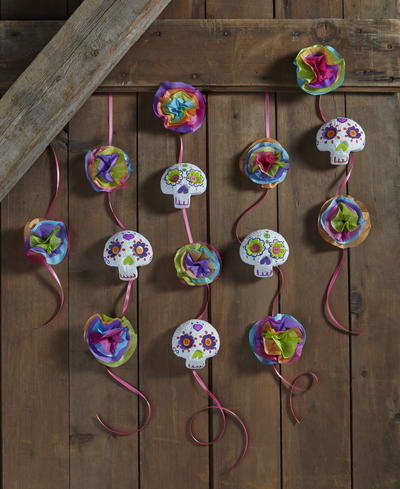
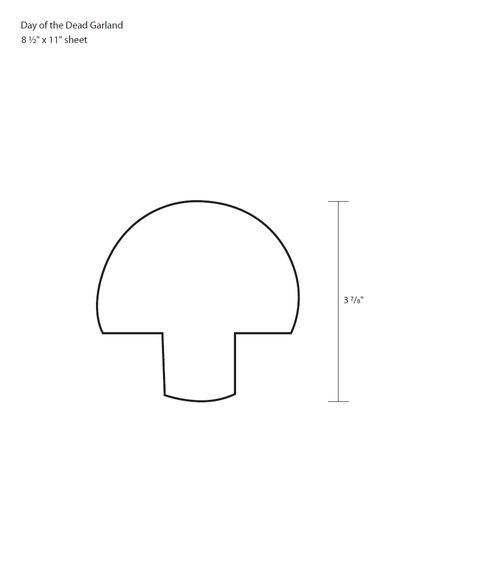
Day of the Dead Garland

If you're looking for fun Halloween arts and crafts, then this Day of the Dead Garland is just the thing for you. Decorate your home this Halloween with this creepy garland. You can make the garland multicolored, as shown, or you can use darker colors for a spookier effect. This festive garland looks a little difficult to make, but beginner crafters shouldn't feel intimidated; a crafter of any skill level can work up this fun Halloween decor. This Halloween craft is so colorful and fun, you might just want to keep it up year round! Go ahead and make this DIY Halloween craft today.
Time to CompleteIn an evening
MaterialsCraft Foam

SeasonFall
HolidayHalloween
Materials List
- FloraCraft® Make It: Fun® Foam: Three 4" Balls, Five 1.5” Balls
- Tissue Paper: Purple, Hot Pink, Orange, Lime Green, Turquoise and White
- Decoupage
- Acrylic Paint: White
- 1-1/2" Felt Flower Buttons: Coordinating Colors
- 15mm Buttons: Coordinating Colors
- Thin Ribbon: Coordinating Colors
- Sharpie® Brush Tip Markers
- Low-Temp Glue Gun
- Serrated Knife
- Flat Paint Brush
- Scissors
- Unsharpened Pencil
Instructions
-
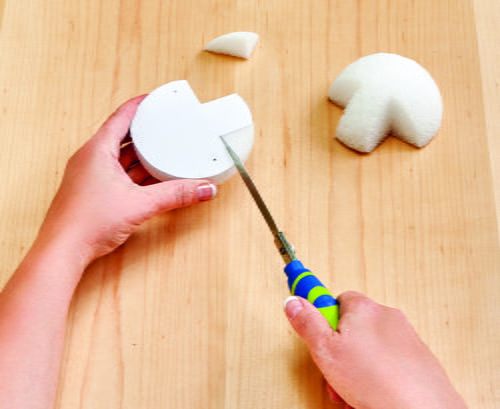
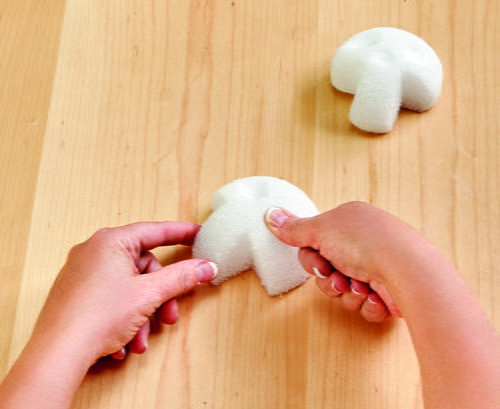
Cut the 4” balls in half with the serrated knife. Cut out the template and pin it to the cut side of a half ball. Cut out the pie-shaped notches to create the bottom portion of the skull. Roll the edges firmly against the table to round the cut edges and shape the back of the skull. Repeat to create desired amount of skulls.
-
Use your thumbs to firmly press the eye sockets into the face of the skulls, about 1” apart and slightly up from the center of the ball. Use your thumb to indent the noses in the same way under the eyes.
-
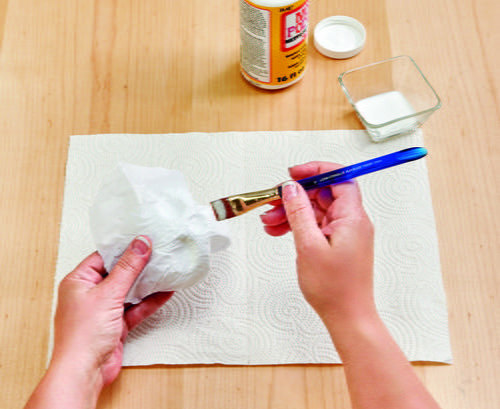
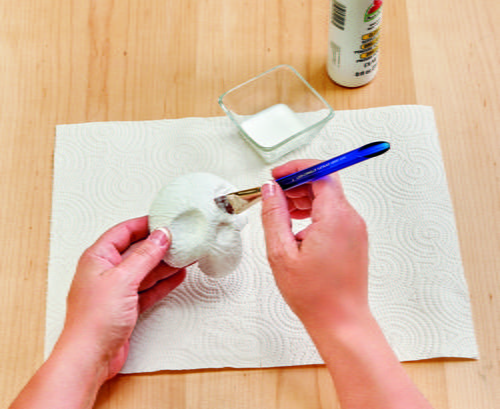
Attach a layer of tissue paper over each skull using decoupage to hold in place. Let dry. Paint each of the skulls white and let dry.
-
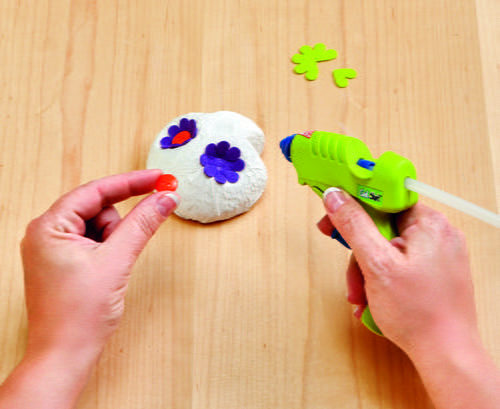
Glue the felt flower buttons into the eyes and glue the 15mm buttons into the centers. Cut apart the felt buttons to create small heart shapes for the nose and glue in place.
-
Use the Sharpie® markers to embellish the skulls as shown.
-
To create the tissue flowers, cut the 1.5” balls in half. Cut ten 4.5” circles, ten 4” circles, ten 3.5” circles, ten 3” circles and ten 2.5” circles of tissue paper. Layer the tissue circles in stacks of five from largest to smallest. Mix and match the colors and sizes to create the colorful flowers shown.
-
Insert the eraser end of the pencil into the center of the rounded side of the 1.5” ball and remove. Lay a stack of tissue circles centered over the hole. Place the pencil eraser end on top of the stack and insert the tissue into the hole, remove the pencil carefully. Repeat to create six flowers.
-
Glue the skulls and flowers along the ribbon to hang.
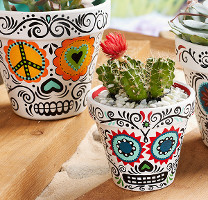
Read NextDay of the Dead Daisy Planters