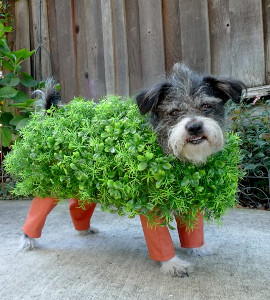
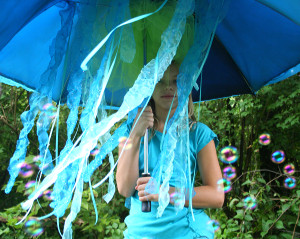
Jellyfish Costume
Jellyfish one of the many wonders of the sea. It seems like it would be hard to recreate the affect of a jellyfish on land. With this Jellyfish Costume, you'll be amazed at the magic you can create. This sewing craft is cinch if you follow these simple steps. All you need is a bit of basic knowledge of how to use a sewing machine. This Halloween craft is divided into sections so you can complete it easily. In this costume, your kids will make a big splash this Halloween!
Materials:
- Umbrella
- Solid, Lightweight Material
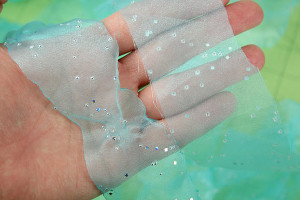
- Specialty Organza (i.e. glittered, sequined, beaded, etc.)
- Tulle
- Batting (or Bubble Wrap)
- Ribbons/Trims
- Needle
- Embroidery Floss
- Coordinating Sewing Machine Thread
- Medium-sized Safety Pins
- Shoestring
- CandleLighter/Match
Instructions:
Finding an Umbrella
1. Find a suitable umbrella for the base of your costume. Sizing will depend upon whom the costume is for.
2. This example uses a golf-sized umbrella and is recommended for older children and/or adults only.
3. If making the costume for a small child, use a child-sized umbrella due to the weight the fabric adds.
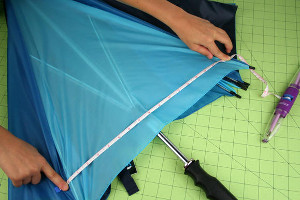
Taking Measurements
1. After finding your umbrella, use the measuring tape on your Sew Taxi to take two measurements.
2. The first will be from the top center, down to the longest point, usually at the end of a spoke.
3. With the umbrella fully extended in the open position, take the measurement between spokes.
4. Finally, count the number of sections/panels your umbrella has. These measurements will help you determine the amount of fabric you need to purchase.
7. Allow for the length + 3” and the width + 4”. The extra inches added on allows for hemming and gathering/overlapping.
Choosing Fabrics
1. When choosing fabrics, choose something that will coordinate with the color of your umbrella and choose solid, but lightweight fabrics.
2. Purchase 3 to 4 yards of tulle in a coordinating but contrasting color to create fullness underneath the umbrella and to act as a covering for the metal spokes.
3. Add in a yard of coordinating organza for the tentacles (the example shows ½ yards of two different colors).
4. Coordinating ribbon, sequin trim, curling ribbon, and/or bubble wrap make for great filler to bulk up the look of the tentacles.

Cutting and Sewing Your Panels
1. Using your rotary cutting tool and cutting mat, cut panels to the size measurement you took in the steps above.
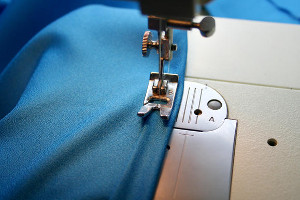
2. For each panel, hem the bottom and both sides using a ½” hem.
3. Hem the top edge with a 1” hem.
4. Then, switch the length of your stitch on your machine to the longest stitch so you can stitch a basting stitch across the top of each panel.
5. Gently pull the top thread on one side and the bottom thread on the opposite side to gather the top of each panel.
Creating the Jellyfish Body
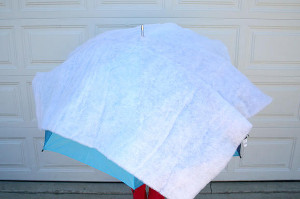
1. First, cover the canopy with a light-weight batting to add more dimension to your jellyfish. You may also use large-bubble bubble wrap in place of the batting.
2. Drape your batting over the umbrella, positioning it with the least amount of overhang, as not to waste.
3. If your umbrella has a finial on top, make a rounded snip in the batting to allow it to slip over the finial.
4. Don’t worry if you have a messy looking snip a few purposefully placed hand-stitches will fix that.
5. Once you have your batting settled around the finial, trim excess batting hanging off the edge of the canopy.
6. Perfection isn't necessary.
7. Use long basting stitching with a needle and embroidery floss to hold batting in place.
8. Then, sew your panels on. To do so, cut a long strand of coordinating embroidery.
9. Thread one end on your needle and triple knot the other end.
10. Open your umbrella to the fully open position, and then hand-stitch the bottom of each panel along the outer perimeter of the umbrella’s canopy allowing the edges to slightly overlap each tip.
11. To start each panel, stitch the panel corner in place by wrapping your stitch from one side of the tip over to the other.
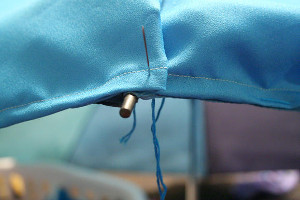
12. Then when stitching the panel edge to the umbrella, use a long blind stitch, slipping the needle in the pocket of the hem to hide the stitches.
13. Once the bottom of each panel is stitched to the canopy, use the same floss to tack the gathered, top edge of each panel around the finial of the umbrella.
14. Even with these stitches, you will still be able to put your umbrella up and down. Shortcut: pin the tops of these panels in place with safety pins instead of stitching, but still take the time to hand-stitch the bottoms of the panels to the canopy. The safety-pin method along the top is especially helpful if using a large umbrella.
15. Next, with the umbrella in the fully open position, drape the organza fabric over the umbrella, positioning it with the least amount of overhang, as not to waste fabric.
16. If your umbrella has a finial on top, you’ll need to make a rounded snip in the organza to allow it to slip over the finial.
17. Once you have your fabric settled around the finial, trim excess organza hanging off the edge of the canopy. Just trim loosely in the shape of the canopy’s perimeter.
18. Now that you have that trimmed, remove from the canopy and light a candle. A new candle works best because the flame will be closer to the top of the jar.
19. Slowly move the edge of the organza over the candle flame approximately 2” above the flame. Continue moving the fabric just as soon as you see the edge start to melt and curl. Be careful not to burn your fingers or get the fabric too close to the flame so you don’t ignite your fabric.
20. When the edge is done all the way around, carefully melt the edge of the circle you snipped out to slip over the finial.
21. After all the edges have been sealed by this melting method, re-drape the fabric and tack down at each tip with a stitch or two or secure with small safety pins. Again, because you are only tacking/pinning at the tips of each panel, this will not affect the normal function of opening and closing the umbrella.
Finishing Touches
1. All that’s left to add is the underside and tentacles.

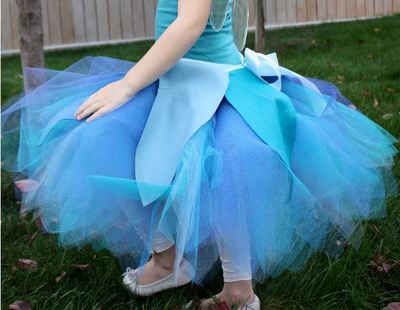
2. For the underside of the jellyfish, create the beginnings of a simple tutu skirt by cutting 3 yards of tulle down to 4” x 23” strips using your cutting mat, rotary cutting and acrylic ruler.
3. Then, knot each strip of tulle onto the shoestring.
4. Once they are all knotted on, slide them together so they make a nice cozy bunch.
5. This tulle bunching will get tied onto the pole, just above the ribs holding the canopy open.
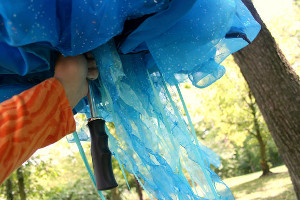
6. Lastly, you need to create the tentacles. To do so, use your cutting mat, rotary cutter and acrylic ruler to cut long strips approximately 2 ½ to 3” wide from the remaining organza.
7. Melt the edges of these strips with the candle flame.
8. Once the edges are melted, hold the strip above the flame to allow the center of these strips to melt and pucker a bit.
9. Create a pucker every 3 - 4”.
10. Gather two varying lengths of organza strips along with several cuts of satin ribbons (varying widths) onto a medium safety pin. Attach tentacles to the underside of the canopy, more toward the center pole.
Read NextPretty Blue Tutu Tutorial