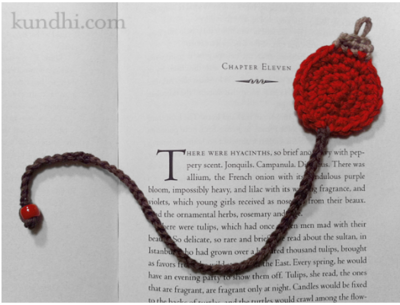
Perfect Pom Pom DIY Bookmarks

Who would have thought that making DIY pom poms could yield the perfect gift for friends and family? You can make these Perfect Pom Pom DIY Bookmarks in their favorite colors, and you'll have a customized gift that can be used over and over again. Learning how to make pom poms is so much fun, and before you know it, you'll have a whole army of these cute little bookmarks. The secret to making the DIY yarn pom poms is using a fork, and you will have flawless pom poms every time! Who knew?
Estimated CostUnder $10
Time to CompleteIn an evening

SeasonWinter
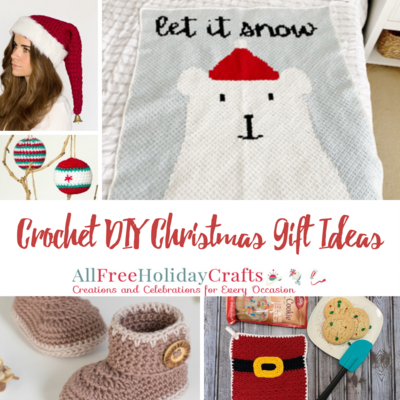
HolidayChristmas
Materials List
- RED HEART Super Saver: 1 skein 512 Turqua, 400 Grey Heather, or 784 Bonbon Print
- Measuring tape
- Dinner fork or large salad fork
- Clipboard
- Small scissors that will cut yarn
Instructions
-
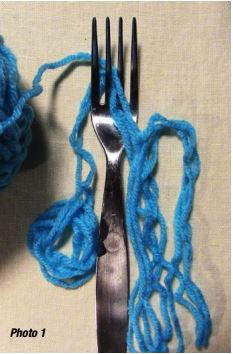
Cut 2 pieces of yarn, each 36” (91.4 cm) long. Be careful not to pull the yarn tight or your pieces will be too short.
-
Place the center of the 2 pieces of yarn in between the center of your fork points, so that half is in front of the fork, and half is in back.
-
Pull a lot of yarn out of your skein! Take the end of the yarn that is still attached to the skein and place it through the same spot in the fork, letting the end hang down as long as the other ends.
-
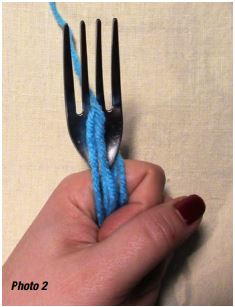
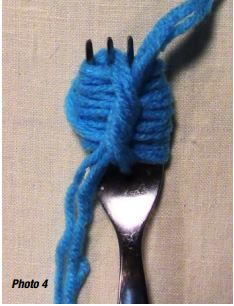
Hold onto your fork with one hand, holding all the yarn ends (there are 5) as well. The yarn that is still attached to the skein should not be in your hand. Take that yarn and wrap it around the fork 30 to 50 times.
-
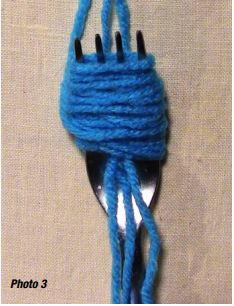
Cut the end of the yarn so that it is as long as the rest of the ends.
-
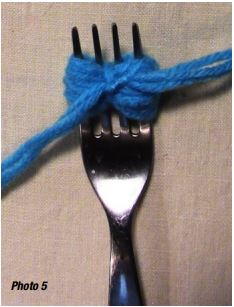
Take the ends of the yarn (there are 3 in front of the fork and 3 in back) and tie them very tightly around the wrapped yarn on your fork. You may need a grown-up’s help to get the knot tight. Then slide the yarn off the fork.
-
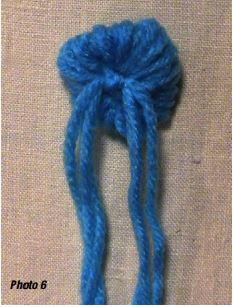
To make the pompom, hold onto the 6 long ends of yarn, and cut through all the loops, being careful not to cut the 6 long ends. If you want a little puff instead of a pompom, then don’t cut the loops!
-
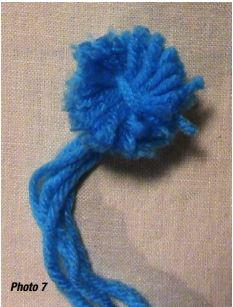
Trim the pompom to make it even.
-
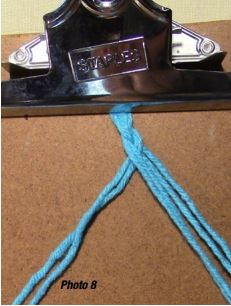
Place the pompom in the clip of a clipboard, or have a friend hold it. Holding 2 pieces of yarn for each strand, braid the ends together. When you are done with your braid, tie a knot in the end and trim.
Read NextYou Tunic Me On
Your Recently Viewed Projects
Thanks for your comment. Don't forget to share!
paver2
Aug 10, 2018
Here's my little stocking stuffer project for Christmas! I will probably have to include a note telling what they are to be used for, if I don't put them in a book, but this looks like a great little gift for big people and little people alike. I need to make at least a dozen!
flowergirl
May 19, 2018
I am in love with my pom poms however I have not found the perfect use for them not until now. Now I need to make others with the long ends because I made the first ones without. Mix up the yarn colours and create something fun that will make a fun gift for your bookworm friends.
KathrynAllison
Dec 23, 2016
What a simple, yet effective idea! You can't go wrong with pom poms. They're so fun and whimsical.
Report Inappropriate Comment
Are you sure you would like to report this comment? It will be flagged for our moderators to take action.
Thank you for taking the time to improve the content on our site.